Manuals
The following text contains hyperlinks. Click on them to be redirected to the websites.
Mobile Apps
Boot Process
Hang & Power On
Place H1 on the ground and secure it with a rope tied in a dead knot at H1’s shoulder latch.
Hang the rope on the clasp of the protective frame to support H1.
Raise H1 along with the protective frame to prepare for startup.
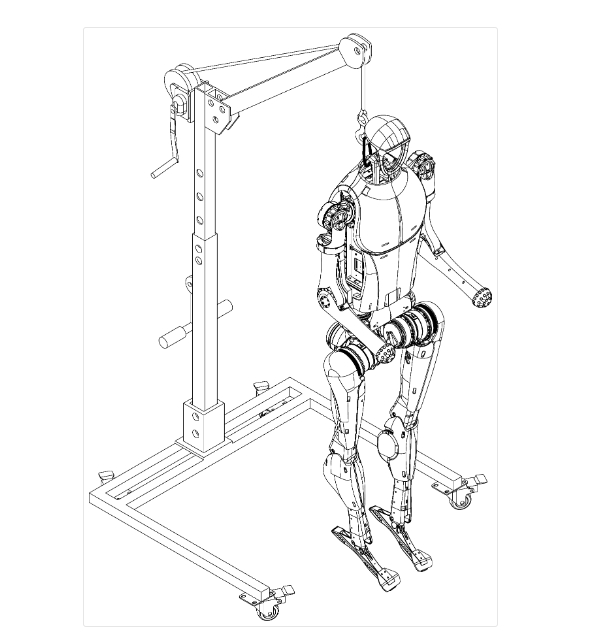
Insert two batteries into the battery compartment with the key-forward orientation.
Turn the arm inward until it reaches its limit and then lower it vertically.
Ensure that the feet are cocked up to their limit.
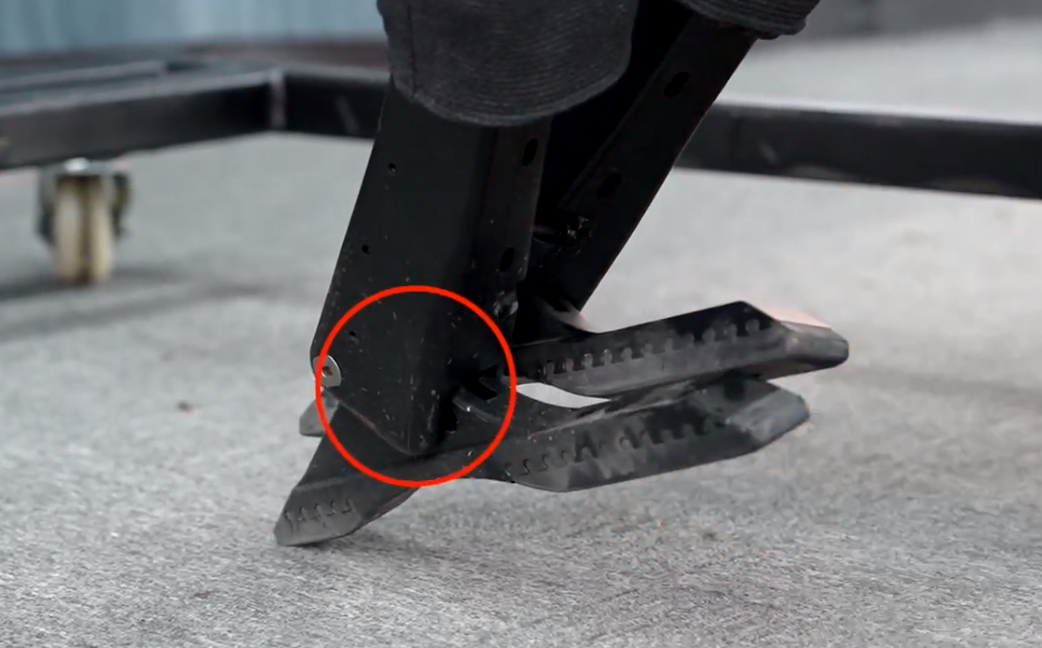
Maintain the position as depicted in the image below:
Short press and long press both batteries simultaneously to power them up.
Wait until you hear the sound indicating that the ankle has reached its limit, and then wait an additional 30 seconds.
Press
L2+Bto unlock damping, then pressL2+UPto enter ready mode. At this point, the feet will spread out, and the arms will be at the sides of the waist.

Lower the H1 with the protective frame until H1’s feet touch the ground and the fuselage remains stable.
Press
R2+Xagain to activate Sport Mode, and H1 will start marching in place.Press
STARTto switch to standing mode, then lower the hook and remove the rope.
Hang & Power Off
Reattach the rope to the protection hook once H1 remains standing.
Raise the hook until there is tension on the rope supporting H1.
Press
L2+Bto enter damping mode.Simultaneously short press and long press both batteries to power off the double battery simultaneously, completing the shutdown process.
Attention
The H1-2 currently does not support sitting down. Do not attempt these actions.
Sit & Power On
Note
The H1 has a comparatively wide hip structure.
Ensure the seating surface is wide and stable before performing the sit-down action.
Step 1: Power On
Place the H1 securely on a chair and install the battery. Adjust the arm and ankle joints to a natural position, then turn the power on.
When the ankle joints reach their mechanical limit and produce an audible click, the initialization sequence is complete.
Step 2: Assisted Stand-Up
Press L2 + B on the remote control to switch the robot into damping mode, then press L2 + UP to command the stand-up motion.
Important
The H1 requires active assistance while standing up.
Use the rear holding bracket to support the robot from behind and prevent backward tipping throughout the motion.
Once fully upright and stable, press R2 + X to enter walking mode. After confirming balance, you may gradually release support.
Sit & Power Off
Position the robot in front of the chair.
Press L2 + LEFT to initiate the sit-down movement.
The robot will step backward and lower into a seated position. Continue holding and supporting the robot using the rear bracket to ensure a controlled descent and prevent loss of balance.
After seated, the robot can be powered off or commanded to stand again if needed.
Note
Emergency Stop: If the H1 enters an abnormal or unsafe state, press L2 + B. The robot will switch to damping mode and lower itself to the ground slowly.
Develop Mode
To enter Develop Mode, ensure that H1 is in the suspension and damping state. Then, press the L2 + R2 key combination on the remote control simultaneously, and H1 enters the Develop mode.. Once activated:
Press L2 + A → H1 enters position mode and assumes a specific diagnostic posture.
Press L2 + B → H1 returns to the damping state.
This process helps confirm whether H1 has successfully entered Develop Mode and can also be used for hardware troubleshooting. Once in Develop Mode, you can begin using the SDK for development and debugging.
Note
In the current system version, the built-in motion control program starts automatically when H1 is powered on. Even if the remote control is not operated, the system continuously sends periodic instructions with a speed of 0.
If you attempt SDK-based development without first entering Develop Mode, instruction conflicts may occur, potentially causing H1 to jitter.
To prevent this, always ensure that H1 is in Develop Mode before using the SDK to stop the motion control program from sending commands. You can verify this by pressing L2 + A.
If the robot’s response does not match the expected behavior shown in the instructional video, press L2 + R2 multiple times to ensure entry into Develop Mode.
Basic Operation
Once The H1 is Powered On and in Sports Mode:
Press
STARTto switch to continuous walking modePush the left joystick forward to move H1 forward.
Press
STARTagain to stop H1 and make it stand in place.Press
STARTonce more to return H1 to continuous walking mode.Push the left joystick back to make H1 walk backward.
Push the right stick to the right to rotate H1 in that direction.
Push the right stick to the left to rotate H1 in the opposite direction.
Press
Bto increase the height of the leg lift, and pressAto lower the leg lift.Reattach the rope to the protection hook once H1 remains standing.
Raise the hook until there is tension on the rope supporting H1.
Press
L2+Bto enter damping mode; at this point, you can safely shut down or enter debug mode.
Operation Guide
The following table describes the different operational modes of the robot:
Concept |
Description |
|---|---|
Zero Torque Mode |
All motors of the robot stop active motion, and there is no damping feeling when swinging. |
Damping Mode |
All motors of the robot stop active motion, but there is a clear damping feeling when swinging. This mode allows the robot to enter Ready Mode. |
Seating Mode |
The robot will slowly transition into a seated position within 5 seconds. |
Ready Mode |
The robot will slowly swing into the preparatory posture before entering Motion Mode, within 5 seconds. |
Motion Mode |
A mode in which the robot can be controlled to move via a remote control. |
Standing Mode |
|
Dance Mode |
A mode for whole-body dynamic coordinated dancing. |
Debug Mode |
This mode is used for low-level development.
|
Attention
When entering Seating Mode, it is necessary to press against the robot’s back. When exiting this mode, push the robot back to transition out of it.
Note: The H1-2 model has only one diagnostic mode and does not support Seating Mode.
The following table provides an overview of button commands for different modes:
Mode |
Button |
Description |
|---|---|---|
General |
L2 + B |
Enter Damping Mode |
L2 + R2 |
Enter Debug Mode |
|
Damping Mode |
L2 + UP |
Enter Ready Mode |
L2 + Y |
Enter Zero Torque Mode |
|
Motion Mode |
R2 + X |
Enter Motion Mode |
Left Joystick Right Joystick X Y A B START L1 + Y SELECT + A SELECT + Y L2 + LEFT |
Translational velocity command ($v_x, v_y$) Yaw angular velocity command ($omega_{yaw}$) Decrease standing height Increase standing height Decrease leg lifting height Increase leg lifting height Adjust posture, take a few steps in place, then stop Enter Dance Mode and return to Motion Mode Handshake Wave Hand Sit Down |
|
Debug Mode |
L2 + A |
Perform position control for diagnostics |
L2 + B |
Stop diagnostics, enter Damping State |
Attention
The H1-2 currently does not support sitting down or dancing. Do not attempt these actions.