Augmentations
Quadruped A1 can be upgraded with different sensros and some other accessories. These upgradations require some modifications in the robot software which is detailed below.
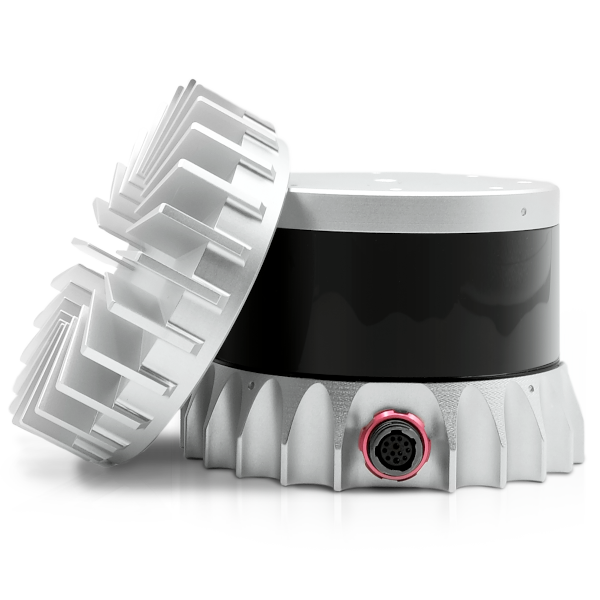
Ouster Installation

For the ouster attachment, the following package has to be installed in the current workspace. The following tutorial can be followed or the provided description.
Note: This tutorial is to only be followed if the ouster software is not already pre-installed.
Install dependencies:
sudo apt install -y build-essential libeigen3-dev libjsoncpp-dev cmake
sudo apt install -y ros-$ROS_DISTRO-pcl-ros ros-$ROS_DISTRO-rviz ros-$ROS_DISTRO-tf2-geometry-msgs
Create a new folder in your catkin workspace
srcfolder namedthird_party:
cd ~/catkin_ws/src
mkdir third_party
cd third_party
Clone the repository into
utils:
git clone --recurse-submodules https://github.com/ouster-lidar/ouster-ros.git
Create your workspace afterwhich you can start configuring the Ouster:
cd ..
catkin build
source devel/setup.bash
Connect the ouster with an ethernet cable, and follow the instructions provided in the software user manual chapter 2.
It may take ~5 mins for it to be detected.
Next navigate to the
utils(if the ouster pkg is provided by us) and in there open a terminal and run:
chmod +x set_static_ip.py
python3 set_static_ip.py
Then make open up your ethernet connection that is in the settings and add a new connection. Give your desired name and then navigate to the
IPv4tab. In it change the connection toManual. In theAddressess, give the address as192.168.123.2and the net mask as255.255.255.0, and save. Then connect to this ip.
Verify that the computer is receiving data from ouster via:
catkin build source devel/setup.bash
Add a new launch file called
ouster.launchto the ouster-ros package in the launch directory, and configure the Lidar to your IP and your specifications:
<?xml version="1.0"?>
<launch>

<arg name="ouster_ns" default="ouster"/>
<arg name="sensor_hostname" default="192.168.123.35"/>
<arg name="udp_dest" default="192.168.123.6"/>
<arg name="lidar_port" default="46481"/>
<arg name="imu_port" default="45352"/>
<arg name="udp_profile_lidar" default=""/>
<arg name="lidar_mode" default="512x10" />
<arg name="timestamp_mode" default="TIME_FROM_ROS_TIME"/>
<arg name="metadata" default=""/>
<arg name="viz" default="false"/>
<arg name="rviz_config" default="$(find ouster_ros)/config/viz.rviz"/>
<arg name="tf_prefix" default=""/>
<include file="$(find ouster_ros)/launch/sensor.launch" pass_all_args="true"/>

<node pkg="tf" type="static_transform_publisher" name="lidar_to_robot" args="0 0 0.55 0 0 0 /base /os_sensor 100" />

</launch>
Verify installation via:
roslaunch ouster_ros ouster.launch viz:=true
ZED2 Installation
This procedure requires that the A1 has access to internet for initial installation if not done already.
Requirements
Zed Camera
Internet connection
Access to the Nvidia onboard A1 (The connectors next to the A1’s head)
Procedure
Verify CUDA 10.2 is installed in the Nvidia Xavier Tegra board.
nvcc -V
If not installed follow:
wget https://developer.download.nvidia.com/compute/cuda/repos/ubuntu1804/x86_64/cuda-ubuntu1804.pin

sudo mv cuda-ubuntu1804.pin /etc/apt/preferences.d/cuda-repository-pin-600

wget https://developer.download.nvidia.com/compute/cuda/11.6.0/local_installers/cuda-repo-ubuntu1804-11-6-local_11.6.0-510.39.01-1_amd64.deb

sudo dpkg -i cuda-repo-ubuntu1804-11-6-local_11.6.0-510.39.01-1_amd64.deb

sudo apt-key add /var/cuda-repo-ubuntu1804-11-6-local/7fa2af80.pub

sudo apt-get update

sudo apt-get -y install cuda
Install from the provided QRE package, alternatively you may get the latest version and install from ZED SDK
Make sure the Ubuntu version is the 18.04, the CUDA is 10.2, and the Nvidia Xavier SDK is selected for your download
Build the provided ZED ROS packages.
catkin build
Verify installation by running
roslaunch zed_wrapper zed2.launchroslaunch zed_display_rviz display_zed2.launch
Updating URDF
The robot’s upgradation also require the changes to be reflected in
URDF. These changes can be made in qre_a1_description. The main to
look at is xacro/accessories.xacro, here one can add joints, other
xacro’s etc. Also make sure to add the respective
ENVIRONMENT VARIABLES in config/robot/qre_a1 from which by
enable or disable the link the changes in the final URDF can be shown.