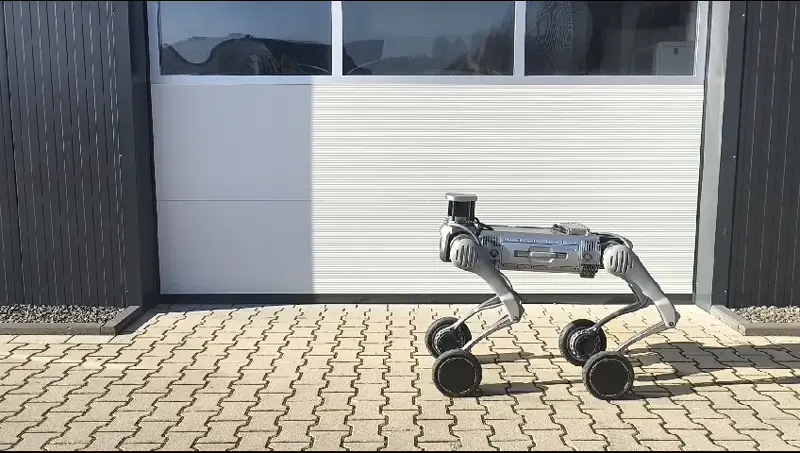
B2 Manuals
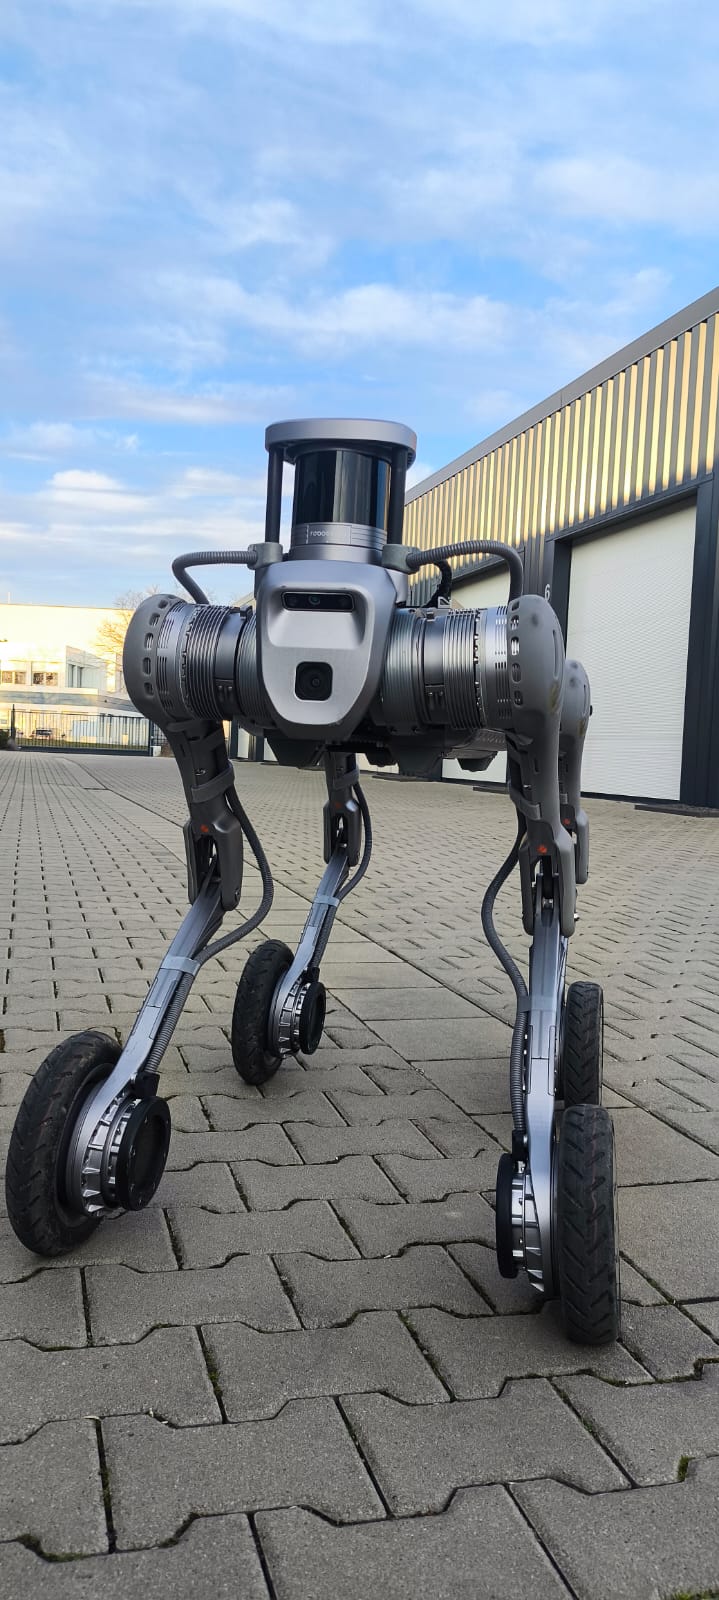
The following text contains hyperlinks. Click on them to be redirected to the websites.
B2 Mobile Apps
The QR codes for Android and iOS to download the B2 app are provided below. Please scan the respective QR code to access the download link.

Scan to download for Android |

Scan to download for iOS |
B2 Itinerary and Transport
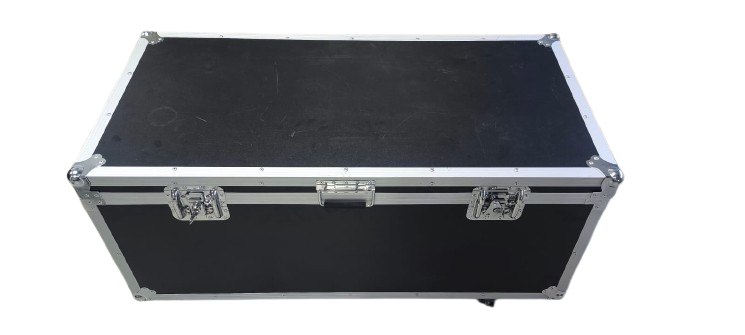
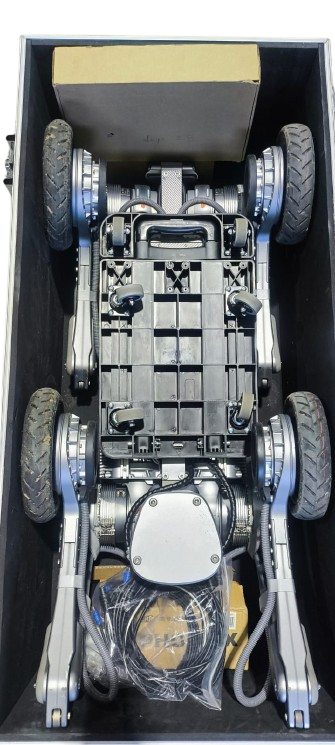
The Unitree B2 is designed for efficient transport and quick deployment, making it ideal for field operations, industrial inspections, and research applications. Its foldable legs and compact structure allow for easy packing, and its approximately 60 kg weight makes it transportable in medium-sized vehicles or provided industrial cases. The Unitree provided case comes with wheels for easy transport and maneuverability. Position the B2 inside the case, ensuring it rests securely without movement. Place the removed, battery pack and charger into designated compartments within the transport case, ensuring they are secured and will not shift during transit.Store additional accessories, such as controllers or spare parts, in separate compartments or pouches within the case to prevent contact with the robot and potential damage.
Note
Always handle the Case with care to prevent damage to the robot and accessories during transport.
B2 Charging
Proper charging procedures are essential to ensure the safe and efficient operation of your Unitree B2 Quabruped Robot. Follow the guidelines below for charging the main battery and the companion remote control.
Battery Charging
Due to self-discharge during transportation and storage, the battery may have low or no power initially. Use the following steps to charge the main battery:
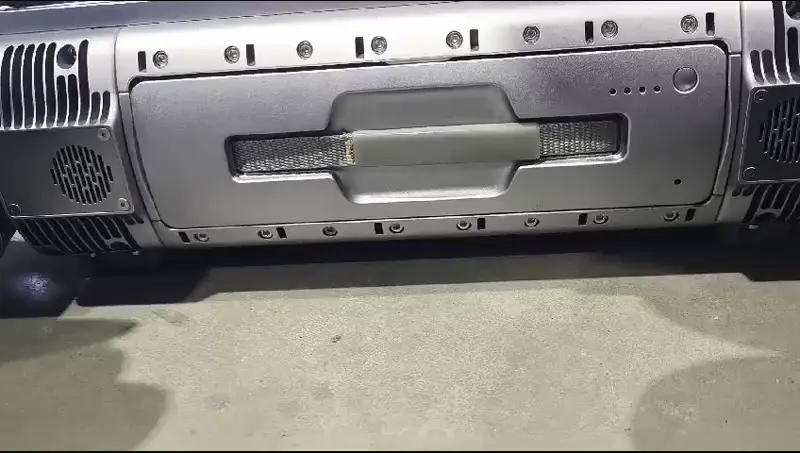
Remove the battery: Detach the battery from the B2 body. Ensure the battery pack strap is pulled out.
Prepare the charger:
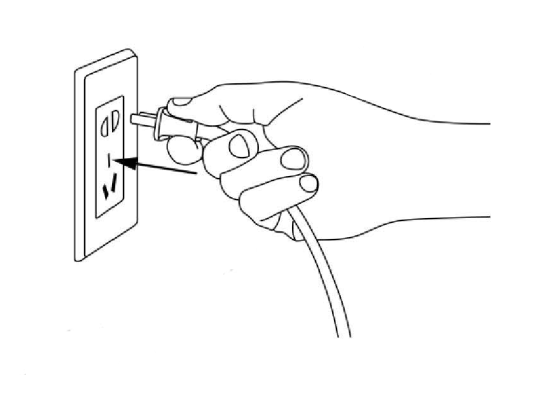
Connect the charger to an AC power source (100-240V, 50/60Hz).
Verify that the external power supply voltage matches the charger’s rated input voltage (marked on the charger’s nameplate). Failure to match voltages may damage the charger.
Connect the battery:
Plug the charger into the AC power supply first.
Ensure the battery pack is switched off before connecting it to the charger to avoid damage.
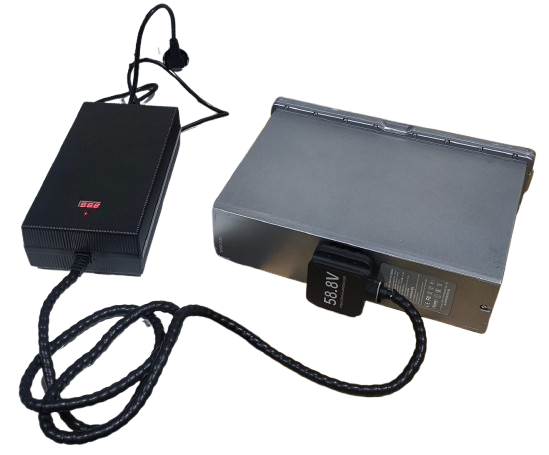
Monitor charging status:
During charging, the battery indicator on the battery pack will flash at a frequency of 1Hz (once per second), displaying the current charge level.
When fully charged, the battery indicator will turn off. Manually disconnect the charger and battery to complete the process.
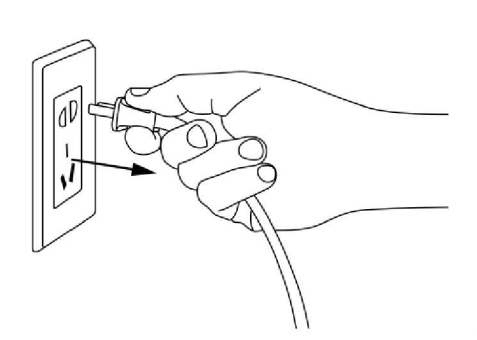
Temperature precautions:
Allow the battery to cool to room temperature before charging if it is warm from recent use.
Warning
Only use official chargers to charge the B2 battery. Using unofficial chargers may cause damage or safety hazards.
Remote Control Charging
The companion remote control requires proper charging to maintain functionality. Follow these steps:
Use a 5V/2A USB charger that complies with FCC/CE standards.
Make sure the remote control is turned off before charging.
Connect the remote control to the charger using a USB Type-C cable.
Monitor the charging indicator: - The power indicator will blink at 1Hz (once per second) while charging, displaying the current charge level. - Once the indicator turns off, charging is complete. Disconnect the charger.

Remote Charging Indicator
The charging indicator lights display the current charge level as shown in the table below:
Indicator Lights |
Current Battery |
Description |
|---|---|---|
LED1 |
0%-25% |
Lowest battery level |
LED1, LED2 |
25%-50% |
Partial charge |
LED1, LED2, LED3 |
50%-75% |
Moderate charge |
All LEDs |
75%-100% |
Fully charged |
Note
For optimal battery life, avoid overcharging and ensure all devices are disconnected after charging.
B2 Unpacking and Initial Setup
Follow the steps below to properly unpack and prepare the Unitree B2 Quabruped Robot for operation.
Unpacking
Position the box on a stable, flat surface with the front side facing up.
Open the top of the box and gently lift the robot out as a whole.
Take out all included components, such as the robot, remote control, charger, and accessories.
Place the robot securely on a stable surface, ready for activation.
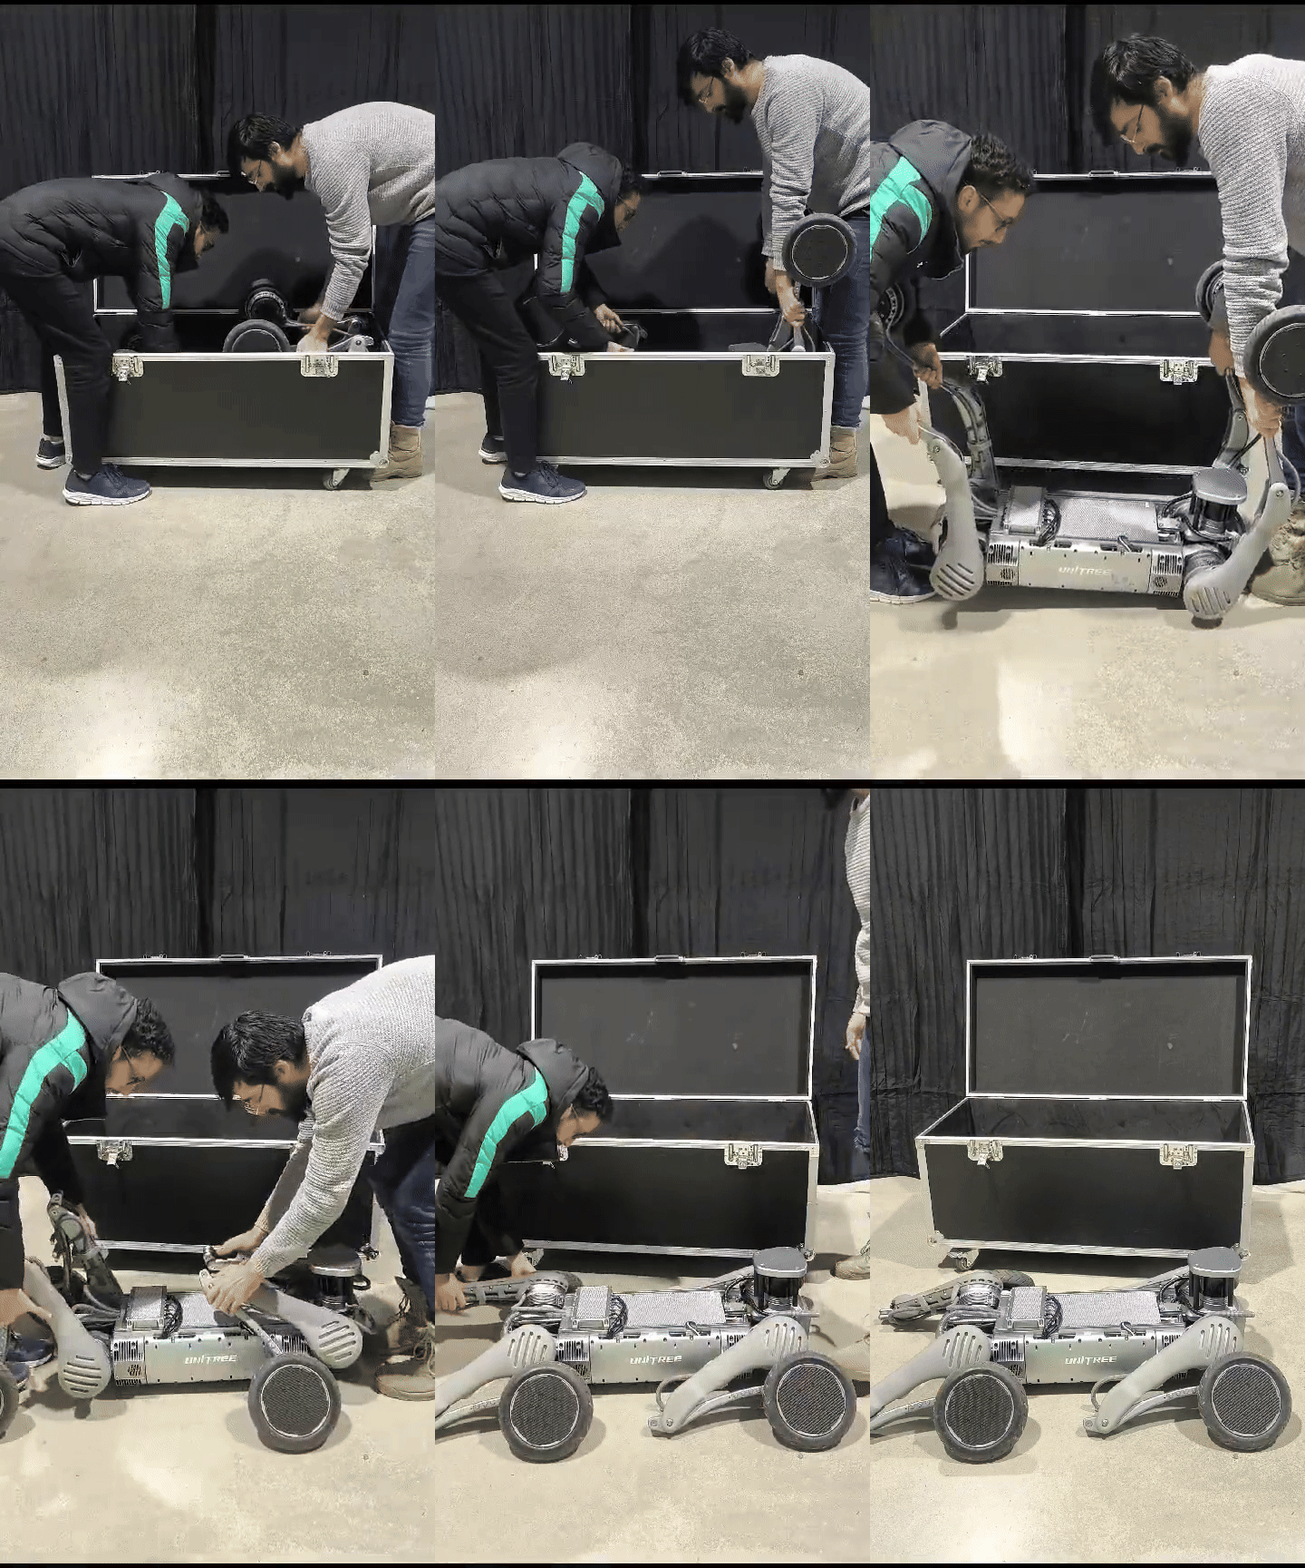
Important
Handle all components with care to avoid damage during unpacking.
Pre-Power-On Checklist
Before powering on the B2, ensure the following:
Use only authentic Unitree Robotics parts and confirm that all parts are in good working condition.
Do not operate the robot if you are intoxicated, under the influence of drugs, or unable to concentrate.
Familiarize yourself with:
Characteristics of each gait mode.
The emergency braking method in case of instability or loss of control.
Check that there are no foreign objects (e.g., water, oil, sand, or soil) inside the robot or its components.
Ensure the remote control and battery pack are fully charged.
B2 Powering On
Attention
If the B2 enters an unexpected state, press L1 + A. The robot will enter damping mode and slowly fall to the ground.
Installing Battery Pack
Insert the battery into the battery compartment on the side of the robot.
Ensure the power switch faces the back of the robot.
If the battery does not fully insert, adjust its direction. Do not forcefully press it to avoid damaging the battery interface and buckle.
Listen for a “click” sound, indicating the battery is securely installed. Verify the buckle is in place.
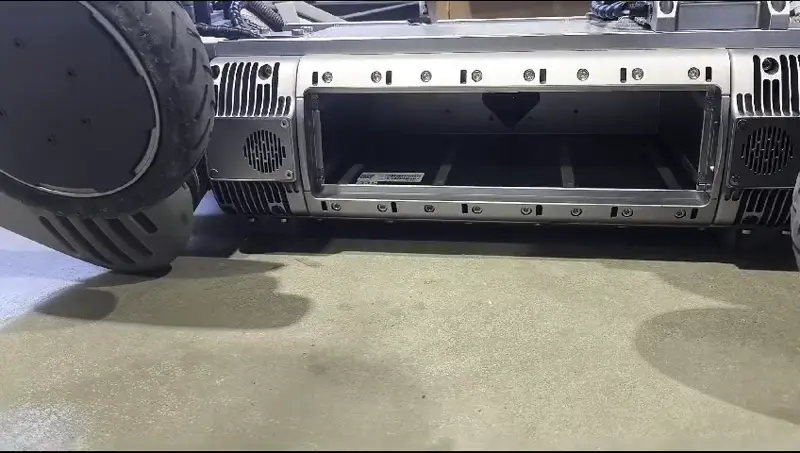
Powering On
Short-press the power button on the battery once.
Press and hold the power button for more than 2 seconds to power on the battery.
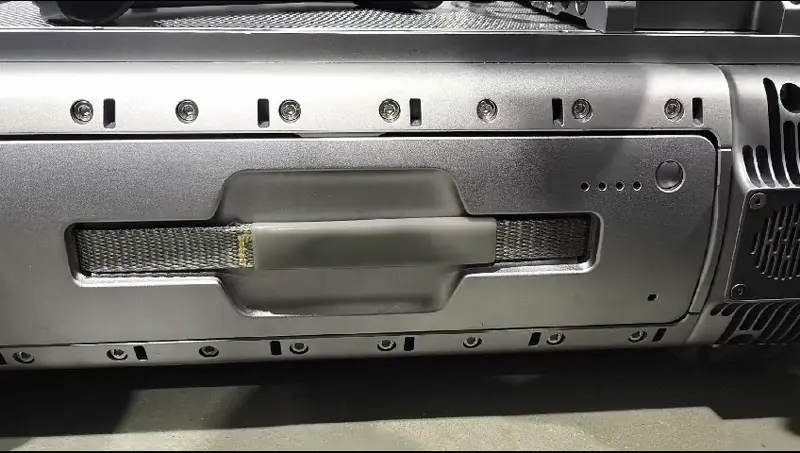
Preparation Before Startup
Place the B2 steadily on the ground.
Operate in a flat and obstacle-free environment for initial startup.
Avoid wet, dusty, or unstable surfaces that may affect performance.
Ensure that all four legs are positioned correctly, with the knees making firm contact with the ground, to maintain stability before powering on the robot.
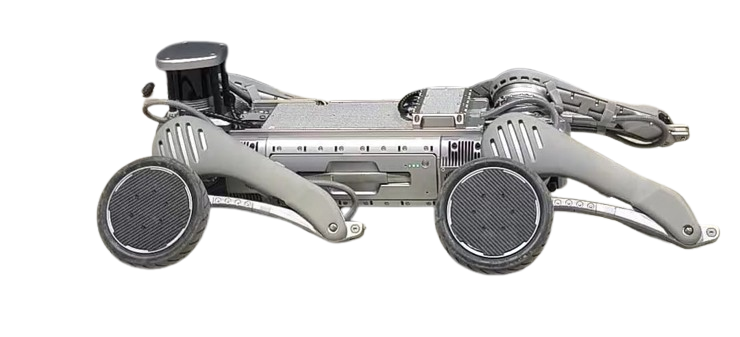
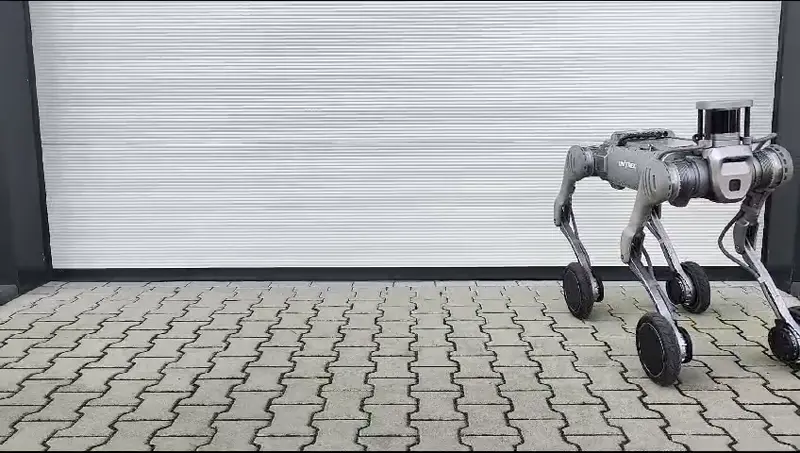
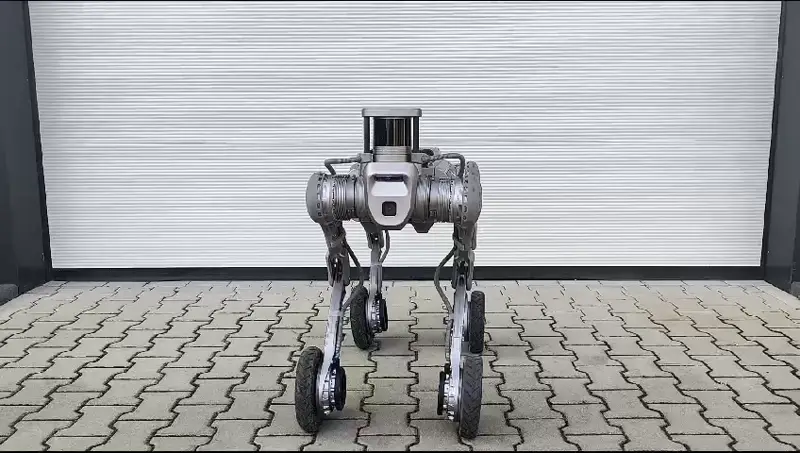
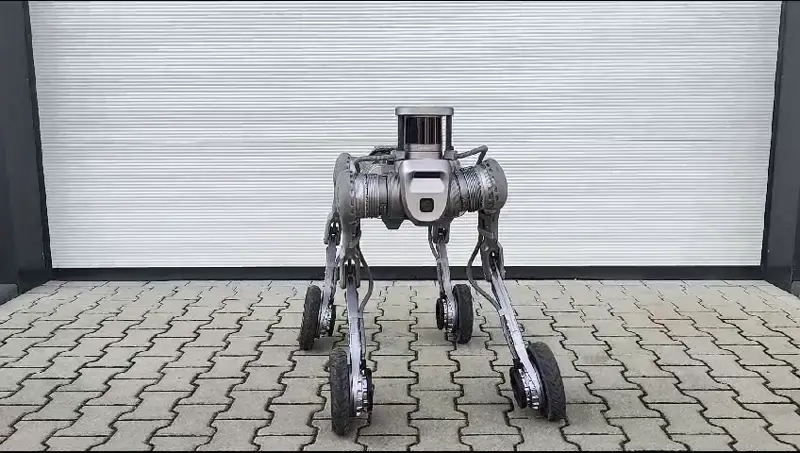
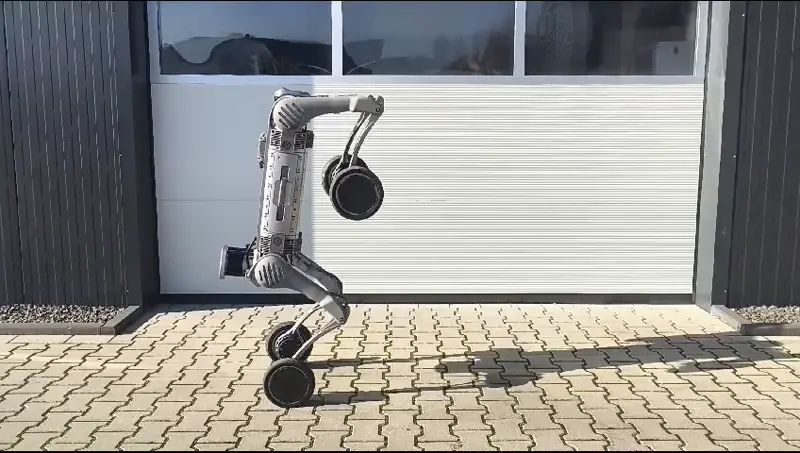
B2-W Start-Up
Short-press and then Long-press and hold the power button for more than 2 seconds on B2-W battery to power on.
Wait approximately 1-2 minutes for the B2-W to fully boot up.
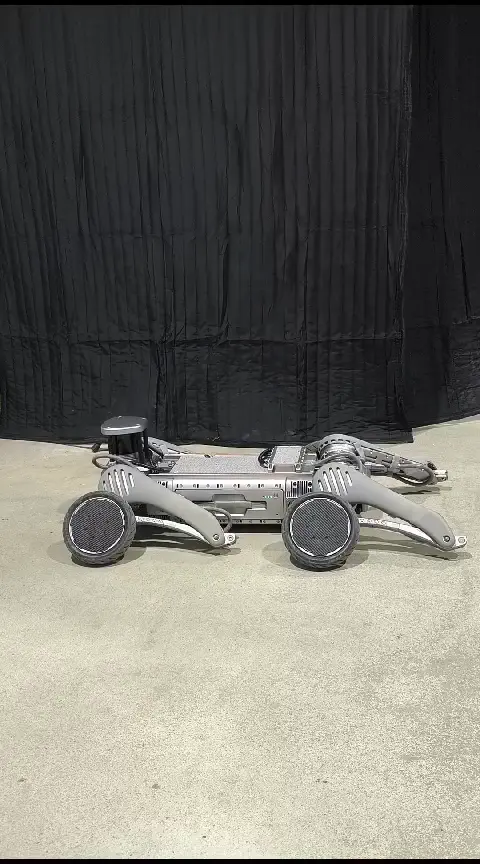
Once the B2-W is powered on, it will automatically stand up.
After the B2 straightens and stands, use the remote control to press:
L2 + R2 + Yfor AI Mode(Slow Movement) orL2 + R2 + Startto enter Normal ode(Fast Movement).
Attention
Maintain a safe distance as the robot will start to get up on its own.
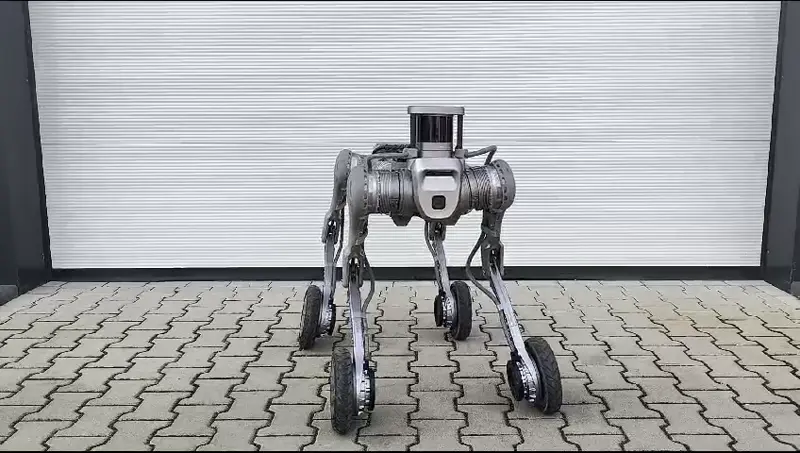
The B2 will rise from the ground, as illustrated in the following GIF:
Emergency Stop
If the B2 enters an unexpected state, press L1 + A. The robot will enter damping mode and slowly fall to the ground.
Attention
Always ensure the suspension setup is stable and secure to prevent damage or accidents during operation.
B2 Switching Off
To ensure the Unitree B2 is safely powered down without causing system damage or instability, follow these steps:
Stop Movement & Enter Idle Mode - Bring the robot to a stable standing or sitting position. - If the robot is moving, halt all operations via the remote controller or command interface.
Disable Motors - Use the controller and press
L2 + Ato disable the actuators and set the robot to a damping state and the robot will sit down. - Ensure all joints are in a relaxed position before proceeding.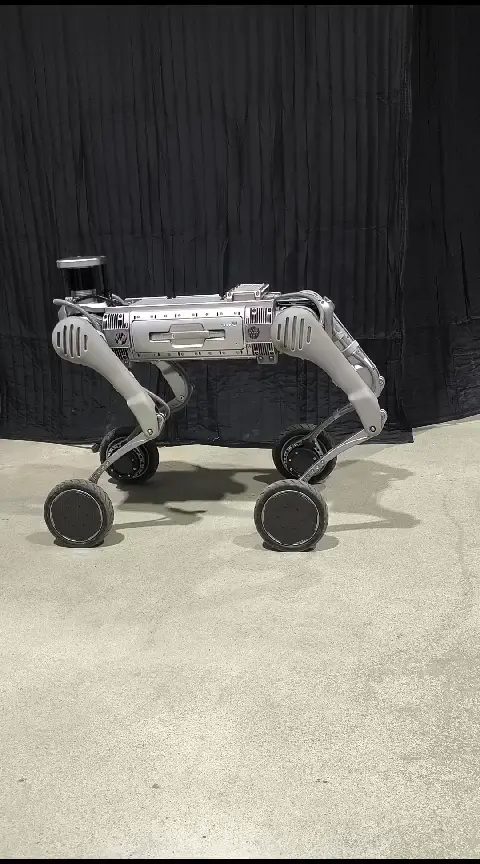
Power Down the System - Press and hold the power button until the shutdown sequence begins. - Wait for indicator lights to turn off, signaling that the system has safely powered down.
Remove the Battery (if needed) - If storing or transporting the B2, remove the battery after shutdown. - Store the battery in a cool, dry place and avoid extreme temperatures.
Post-Shutdown Inspection - Check for loose components or unusual noises that may indicate wear. - If needed, clean sensors and store the B2 in a secure location.
By following this safe shutdown process, you can prolong the lifespan of the B2 and prevent unexpected issues during future startups.
B2-W Packing
The B2-W robot is designed for easy transport and storage, with a compact structure and foldable legs for efficient packing. Follow the steps below to pack the B2-W robot securely for transport.
Power Off the Robot: Ensure the B2-W robot is powered off before packing to prevent accidental activation.
Fold the Legs: Gently fold the legs of the robot to reduce its size and prepare for packing.
Place the Robot in the Case: Position the robot securely inside the provided case, ensuring it rests without movement.
Secure the Robot: Use the provided straps or padding to secure the robot in place and prevent shifting during transport.
Store Accessories: Place the removed battery pack, charger, and any additional accessories in designated compartments within the case.
Close the Case: Seal the case securely and ensure all components are stored safely for transport.
B2 Basic Operation
Remote Control
The remote control is part of the B2 remote control module, equipped with a digital transmission module and a Bluetooth module. Using the Unitree Explore App, the robot and remote control can be bound for seamless connection upon powering on.
Features:
3-axis posture and position stability control.
Movement capabilities include:
Forward, backward, left, right, turn in place.
Walking in predefined patterns: straight line, circular, linear, rectangular.
Navigation on flat surfaces, slopes, and steps.
Ergonomic design for improved grip and comfort.
Key Components
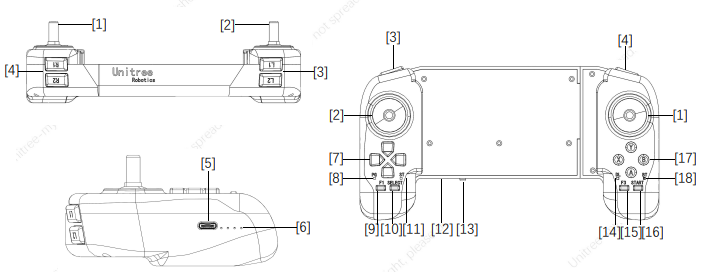
The remote control consists of the following key parts:
[1] Right Rocker
[2] Left Rocker
[3] Key L1 / L2
[4] Key R1 / R2
[5] Type C Charging Interface
[6] Data transmission Signal Light
[7] Arrow Keys
[8] Power Connect Indicator
[9] SELECT Key
[10] F1 (Function Setting Key)
[11] Charging Status Indicator
[12] Power Connect Indicator
[13] Power Button
[14] Data Transmission Indicator Light
[15] F3 (Function Setting Key)
[16] START Key
[17] Action Keys
[18] Bluetooth Signal Indicator Light
Technical Specifications
Parameter |
Specification |
Charging Voltage |
5.0V |
Charging Current |
700mA |
Battery Capacity |
780mAh Lithium Battery |
Communication Mode |
Data Transmission, Bluetooth |
Running Time |
5 hours |
Remote Control Range |
Above 100m (open environment) |
Installation and Calibration
Installing the Joystick
Rocker Calibration
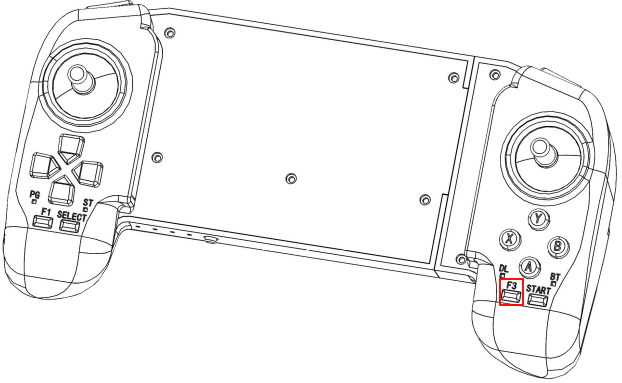
Hold the remote control without touching the rocker.
Press
F1andF3simultaneously to enter calibration mode.The remote will emit a continuous “beep-beep” sound (1 beep/second).
Rotate the left and right rockers to full rudder several times.
When the beeping stops, press
F3once to save the calibration.
Attention
Do not touch the rockers before entering calibration mode.
Move the rockers only after calibration mode is active.
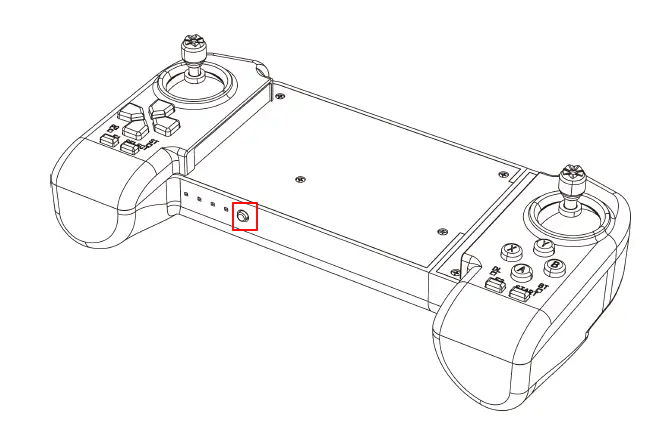
Powering On/Off
Turning On
Short-press the power button once.
Long-press the power button for 2+ seconds until you hear two “beeps.”
Turning Off
Short-press the power button once.
Long-press the power button for 2+ seconds until you hear three “beeps.”
Tip
The sequence is short press + long press for 2 seconds or more for both turning on and off.
Vibration and Sound Settings
Vibration/Sound Toggle
Switching vibration: Quickly press
F33 times to switch to vibration mode.Switch sound: Quickly press
F33 times to switch to sound mode.
Vibration/Sound Switch
Turn off vibration/sound: Quickly press
F13 times to turn off vibration/sound.Turn on vibration/sound: Quickly press
F13 times turn on vibration/sound.
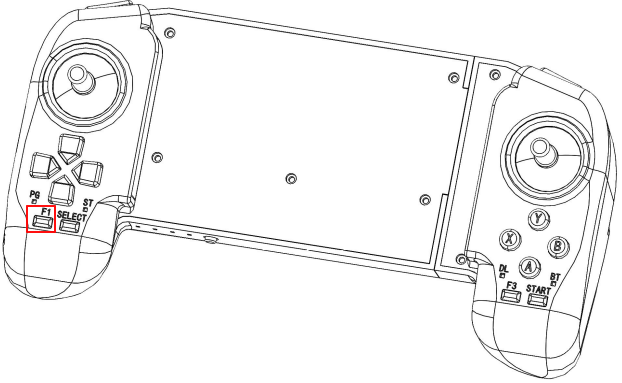
Save Feedback Settings
To save vibration/sound settings for the next startup: - Hold down the
F1button during shutdown.
Attention
By default, feedback settings (vibration/sound) are not saved after modifying.
Important
Always ensure to follow the correct steps to avoid damaging the remote control or affecting calibration accuracy.
Remote Control Binding
First-Time Use: Binding the Remote Control
To use the remote control for the first time:
Open the Unitree Explore App and Select “Device”.
Go to the “Data” Section.
Select “RemoteControl Binding”
Tap “Change” and enter the corresponding remote control code.
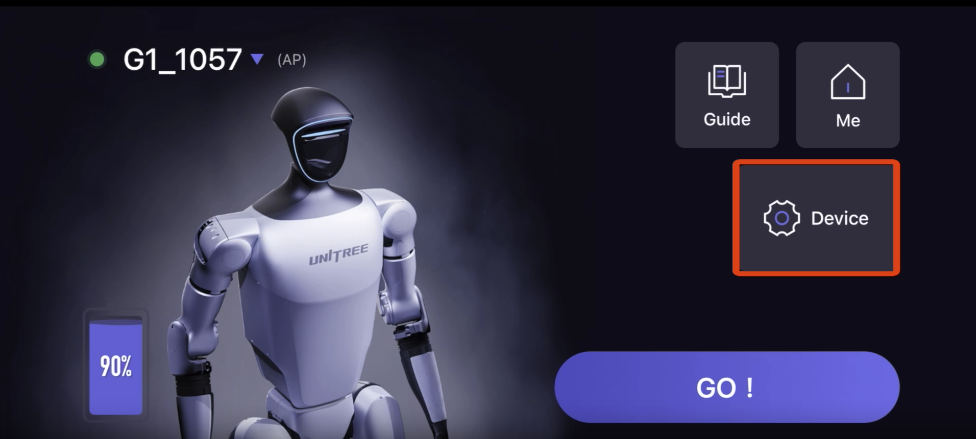
Navigate to “Device” |
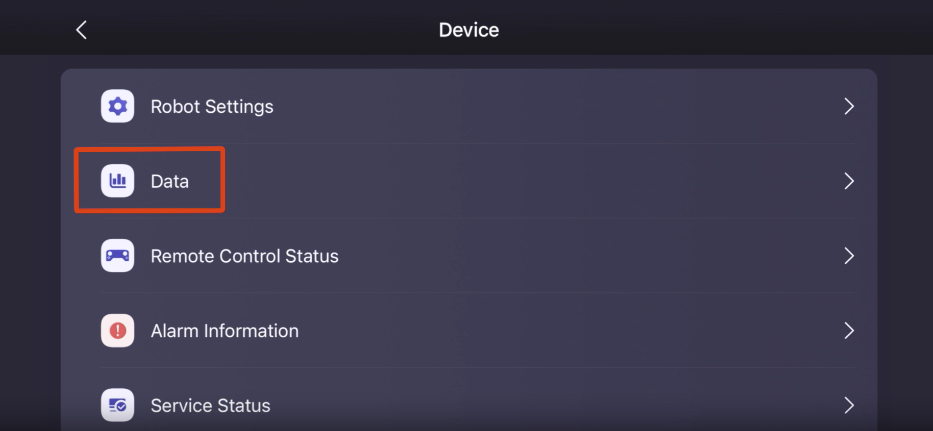
Access the “Data” Tab |
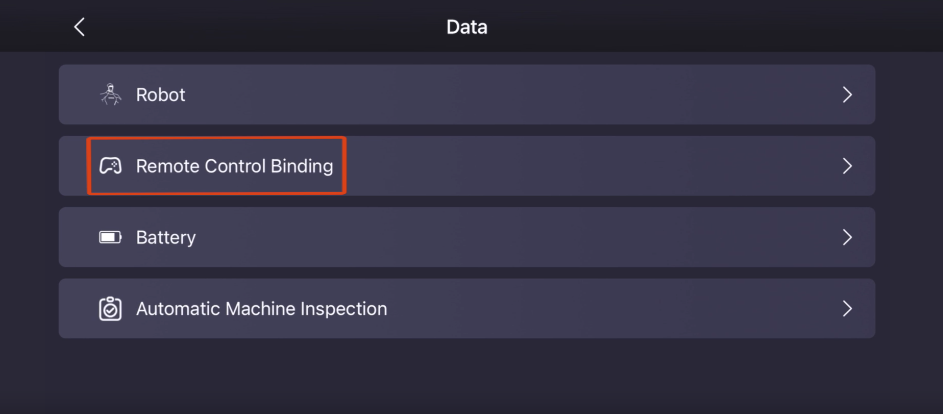
Open “RemoteControl Binding” |
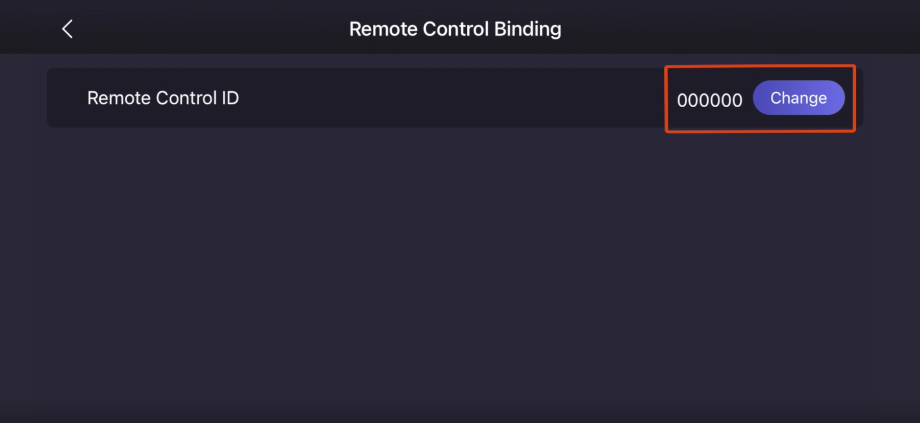
Select “Change” |
Once the remote control is bound to the digital transmission module on the robot, it can connect automatically in subsequent uses.
Verifying Connection
When the remote control is powered on and successfully connected to B2, the right DL indicator light will turn on.
This indicates the remote control is linked to the B2 digital transmission module, and you can now operate B2 using the remote control.
Remote Control Basic Operation
When using the remote control to maneuver the B2 robot with joysticks, follow these control methods:
Left Joystick
Push Forward:
Push Backward:
Push Left:
Push Right:
Right Joystick
Right Turn:
Push Joystick towards Right
Left Turn:
Push Joystick towards Left
Concept Descriptions
The B2 robot features several operational modes. Below is a detailed explanation of each mode:
Mode |
Description |
|---|---|
Locking the Standing Mode |
When the robot dog is standing, lock the legs and do not respond to joystick commands. |
Damping Mode |
When the robot dog is standing, lock the legs and do not respond to joystick commands. |
Walking Mode |
When the remote control does not push the lever, the robot dog will remain stationary. After pushing the rocker, the robot dog will move in a stepping motion. |
Continuous Walking Mode |
The robot is always in a stepping state and responds to the joystick command to move. |
Running Mode |
When the remote control does not push the lever, the robot dog remains in place. When the lever is pushed, the robot dog will move and run. |
Continuous Running Mode |
The robot is always in a running state and responds to the joystick command to move at the same time. |
Stair Climbing Mode |
After entering this mode, regular operation control can be used to climb stairs (up and down). |
Visual Mode |
After entering this mode, AI operation control can perform visual walking, such as climbing stairs and walking on gravel roads. |
Endurance Mode |
After entering this mode in regular operation control, adjust the dogleg power mode appropriately to reduce power consumption. |
Pose Mode |
fter entering this mode, the regular operation control can swing the body according to the joystick command. |
Crossing Mode |
Supports 40cm cross-ditch and climbing (this mode is dangerous, no one can stand in front, and each execution requires App authorization) |
Key Descriptions
The B2 offers two distinct operational modes: Mode 1 - Regular Motion Control and Mode 2 - AI Motion Control. Each mode is designed to optimize performance for different scenarios:
Regular Motion Control (Mode 1): This mode relies on manual input and user decision-making, ensuring greater stability and reliability for tasks such as running and posing. It is ideal for controlled environments where precision and consistency are required.
AI Motion Control (Mode 2): In this mode, the B2 autonomously adapts to its surroundings, making real-time decisions. This enables the robot to navigate complex terrain, climb stairs, and adjust its movement dynamically without direct manual intervention.
By default, the B2 starts in AI Motion Control Mode upon boot-up. You can switch between modes using the remote control, following the instructions provided in the table below.
B2 Regular Motion Control
Basic Movement
Gesture |
Button Combination |
|---|---|
Move back or forth |
Push Left Rocker Forward/Backward |
Sideways movement |
Push Left Rocker Push Left/Right |
Posture Switching
The B2 robot supports various postures for different applications. Use the table below for guidance:
Button |
Function |
|---|---|
START |
Unlock/Lock Walk Mode |
START(double click) |
Continuous walking mode |
SELECT |
Make a pose |
L2 (Long Press) + A |
Switch between standing lock and lying down posture |
L2 (Long Press) + B |
Damping mode (soft emergency stop) |
L2 (Long Press) + START |
Running mode |
L2 (Long Press) + START (Double Click) |
Continuous running mode |
RIGHT (Long Press) + START |
Stair climbing mode: ascending stairs, descending stairs |
L1 (Long Press) + SELECT |
Endurance mode |
L2 (Long Press) + X |
Back to stand up after falling down |
L1 + up/down arrow |
Adjust leg lifting height (5-35cm) |
Up/down arrow |
Adjust body height (45-60cm) |
L1 (Long Press) + L2 (Long Press) + R1 (Long Press)+ R2 (Long Press) + X (Click) |
Select regular motion control |
L1 (Long Press) + L2 (Long Press) + R1 (Long Press) + R2 (Long Press) + B (Click) |
Select AI motion control |
B2 AI Motion Control 2
Button |
Function |
|---|---|
START |
Unlock/Lock Walk Mode |
START(double click) |
Continuous walking mode |
L2 (Long Press) + A |
Switch between standing lock and lying down posture |
L2 (Long Press) + B |
Damping mode (soft emergency stop) |
L2 (Long Press) + X |
Fall recovery standing |
x |
Visual assisted walking |
B |
walking on level ground |
L2 (Double Click) |
Low-speed mode |
L1 (Double Click) |
High-speed mode |
L1 (Long Press) + L2 (Long Press) + R1 (Long Press)+ R2 (Long Press) + X (Click) |
Select regular motion control |
L1 (Long Press) + L2 (Long Press) + R1 (Long Press) + R2 (Long Press) + B (Click) |
Select AI motion control |
B2-W Remote Control Instructions
Disclaimer
The Unitree B2 is designed for controlled environments. Always adhere to operational guidelines to prevent instability or damage. Unauthorized usage or deviations from specified instructions may void warranty and risk safety.
