GO1 OM Quick Start
Attention
Please carefully review this document. In case of any uncertainty, it is crucial to seek guidance from specialists, experts, or manufacturers of the assemblies used. The robot should not be put into operation until clarification is obtained.
If there are doubts, please refer to the guides below or reach out to a specialist, expert, or manufacturer of the assemblies used. It is imperative not to operate the robot without proper clarification.
Ensure that individuals unfamiliar with robotics or these instructions do not operate the robot, as robots can be hazardous in the hands of untrained users.
Note
The robot provided by QUADRUPED Robotics GmbH is designated as a research and development (R&D) device and does not carry a CE Marking or Certificate of Incorporation. A foundational understanding of ROS (Robot Operating System) is essential for users. If unfamiliar with ROS, we recommend consulting the ROS Wiki for guidance.
It is important to note that the mentioned robot is classified as a partly completed machine under the Machinery Directive 2006/42/EC and does not bear a CE marking.
Clients acknowledge and agree that any information or materials provided by QUADRUPED Robotics GmbH are intended solely for R&D purposes. Services are provided on an “AS IS” basis, without any representation or warranty, whether expressed or implied, including but not limited to merchantability, fitness for a particular purpose, non-infringement, or any other warranty.
QUADRUPED Robotics GmbH shall not be held liable for damages, including but not limited to direct, indirect, special, incidental, or consequential damages, arising from the use or inability to use the provided information or materials. This limitation on liability applies regardless of the form of action, be it in contract, tort, or otherwise.
GO1 Robot Interface
Guidelines for interacting with the robot, relevant to GO1’s built-in computers
1. Static Network Connection
For initial setup, use a LAN cable to configure the robot’s WLAN network.
On your PC (not the robot), go to Settings → Network in Ubuntu, click on + to create a new connection.
Change the connection to Manual in IPv4 settings,
set the IP address to 192.168.123.51, Netmask to 24, save, and restart your network.
Once connected successfully, check the host’s local IP by typing in the Host PC’s terminal.
After establishing a successful connection, verify the host’s local IP using the Host PC’s terminal with the command:
ifconfig
Next, ping the robot:
ping 192.168.123.14
Access the robot via SSH:
ssh -X unitree@192.168.123.14
The default password is: 123
Note
At times, the presence of additional networks can create interruptions when connecting to the GO1. It is advisable to have only the connection to the robot active, while deactivating all others.
2. WiFi Connection
Connect to the GO1 WiFi using its hotspot with the default password ‘00000000’.
Access the robot via SSH:
ssh -X pi@192.168.12.1
The default password is:
123
Then you can ssh again into the Nvidia through the pi
ssh -X unitree@192.168.123.14
The default password is:
123
Note
The LAN connection is faster and ideal for development.
3. Screen Connection
Another method for connecting to the robot involves using an HDMI cable along with a mouse and keyboard. This setup enables connecting the robot to your local network, allowing subsequent connections over WiFi.
4. Enabling Internet
To enable internet connectivity on the GO1, ensure it is connected via an LAN cable with internet access, and then simply run:
sudo ip link set eth0 down && sudo ip link set eth0 up
sudo dhclient eth0
sudo apt update
Note
It may take some time for it to get detected, you can check by running ping google.com.
By default, internet is not required
Initialization
1. Powering on the GO1
Press the battery button once and then press the battery button again, holding it for 3 seconds.
Press the remote button located on the bottom side of the controller once, and then press it again, holding it for 3 seconds (similar to the battery).
2. Powering the Open Manipulator
Once the GO1 has completed its boot process, proceed to power on the Open Manipulator. This can be done either by connecting the power connector on the top or by activating the power button situated on the U2D2 board within the top housing.
Note
Avoid turning on the Open Manipulator while the GO1 is still in the booting process, as doing so alters its internal mode and may impede communication with the GO1 SDK.
Installation
Please Clone the repository from out github accout to your Ros1 workspace by following the command:
git clone https://github.com/MYBOTSHOP/qre_go1.git
Once the repository is downloaded, navigate to your ROS workspace and install the ROS dependencies.
rosdep install --from-paths src --ignore-src -r -y
Grant permissions and execute to install GO1 Navigation dependencies.
sudo chmod + x go1_install.bash && ./ go1_install.bash
Now build and source your workspace
catkin build -DCMAKE_BUILD_TYPE=Release
source devel /setup.bash
Note
For arm64 (GO1 Nvidia), sometimes the build is not detected so you can replace these lines in CMakeLists.txt in go1 base:
if ("${CMAKE_SYSTEM_PROCESSOR}" MATCHES "x86_64.*")
    set (SYSTEM_ARCHITECTURE amd64)
endif ()
if ("${CMAKE_SYSTEM_PROCESSOR}" MATCHES "aarch64.*")
    set (SYSTEM_ARCHITECTURE arm64)
endif ()
followed by
set (SYSTEM_ARCHITECTURE arm64)
GO1 Operation
If you’ve connected through LAN, you can initiate and operate the robot using
sudo su
source <your_workspace>/devel/setup.bash
roslaunch go1_bringup bringup.launch
1. Teleoperation
rosrun teleop_twist_keyboard teleop_twist_keyboard.py
2. Visualization
roslaunch go1_viz view_robot.launch
Note
This can be run on your own local PC or on the GO1, both should work. Ensure that if you are connecting via WiFi the go1 base launch file has the target ip set to WiFi or else to LAN.
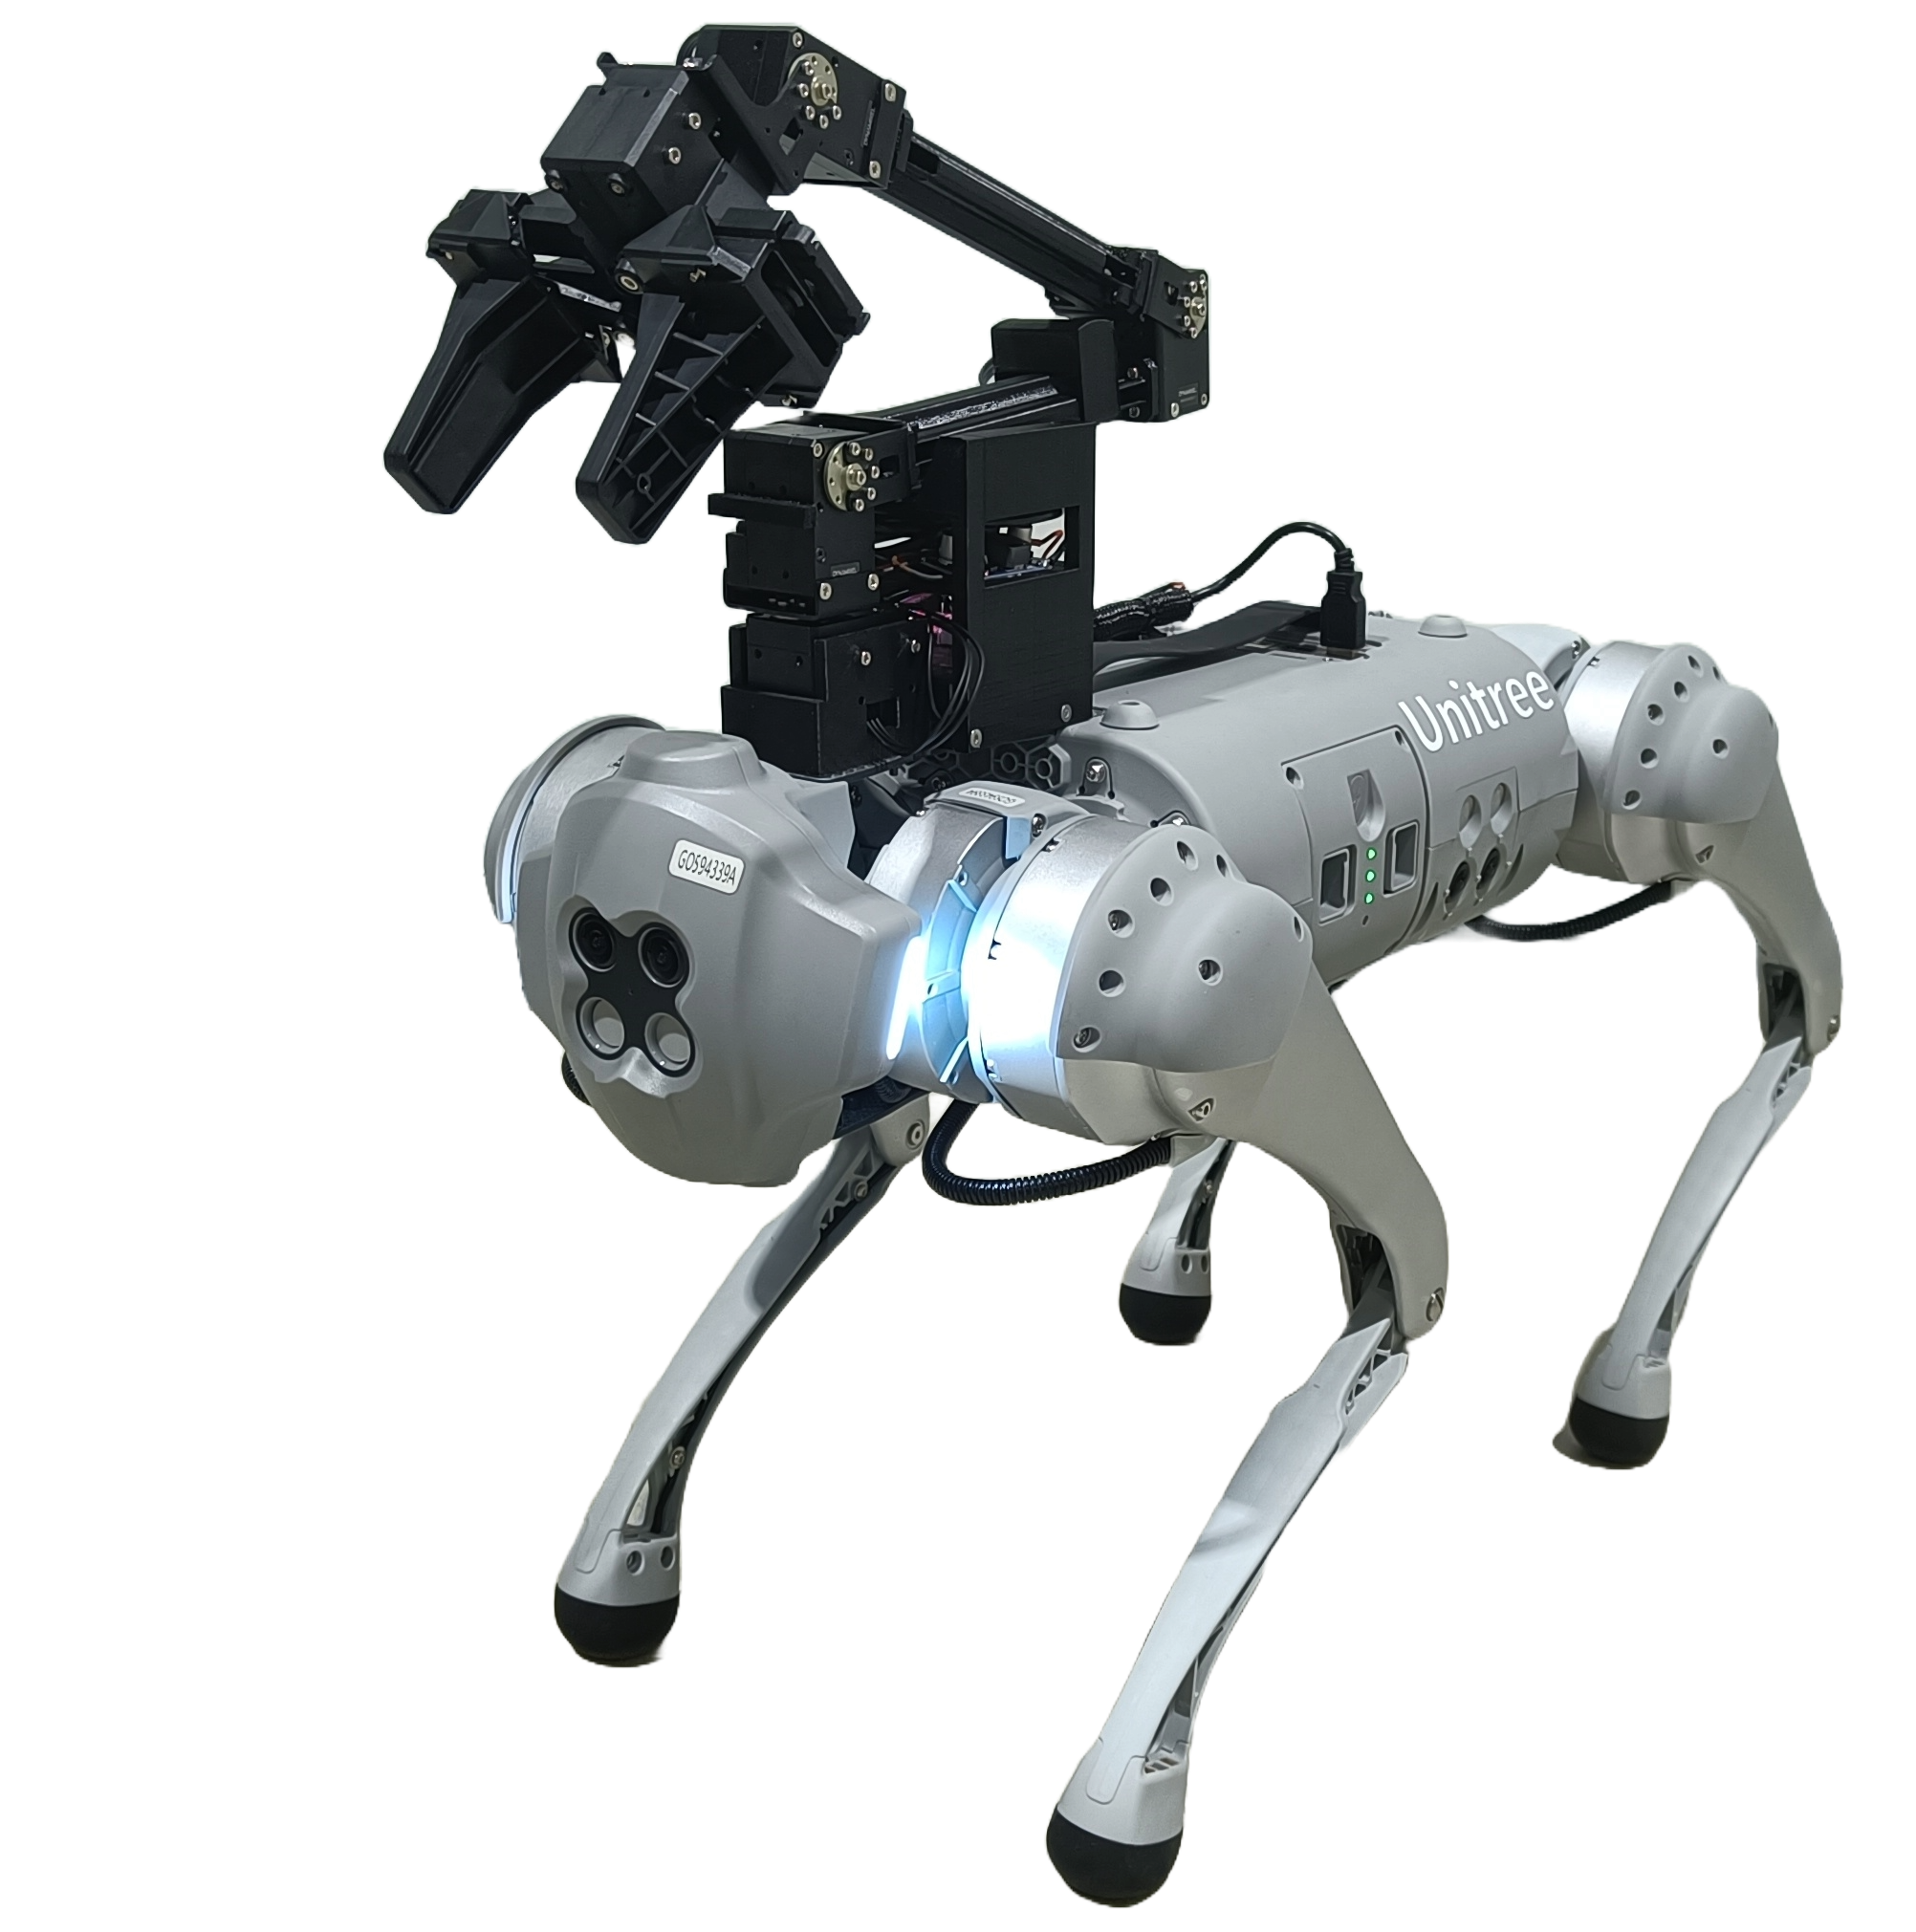
GO1 & Open Manipulator Operation
Note
These are found in the same GO1 repository under the github branch name melodic-robotis.
To launch the GO1 with the Open Manipulator, use the following command:
roslaunch go1_bringup mmp_bringup.launch
For the initial setup of the GO1 with the Open Manipulator, grant permissions to the port using the following command:
sudo chmod a+rw /dev/ttyUSB0
1. GO1 Open Manipulator Namespace
Take note that when using the GO1 MMP (Mobile Manipulation Platform) launch file, all GO1 packages are contained within the namespace “GO1” to avoid conflicts with the open manipulator’s packages. Utilize ROS commands to navigate and understand these namespaces.
rosnode list
rostopic list
rosservice list
By default, the GO1’s normal bring-up does not contain namespaces for every node.
Attention
Ensure to execute this on the GO1 PC with the connected open manipulator! The default PC for this purpose is the Nvidia board with the IP address 192.168.123.14.
2. Open Manipulator Gripper
Open manipulator can be controller via the Moveit arm controller group. The gripper can be controller via the services
To open the gripper
rosservice call /go1_robotis/goal_tool_control "planning_group: ’gripper’
joint_position :
joint_name :
- ’ gripper ’
position :
- 0.01
max_accelerations_scaling _factor:0.0
max_velocity_scaling_factor:0.0
path_time : 0.0 "
To close the gripper
rosservice call /go1_robotis/goal_tool_control "planning_group : ’gripper’
joint_position :
joint_name :
- ’ gripper ’
position :
- -0.01
max_accelerations_scaling _factor:0.0
max_velocity_scaling_factor:0.0
path_time : 0.0 "
For different positions, you may use any value between -0.01 to 0.01, where 0.01 is for opening and -0.01 is for closing.
3. Open Manipulator Demo
The GO1 demo package can be employed to evaluate the Moveit package’s functionality. Initially, make sure the mmp_bringup package is launched:
roslaunch go1_bringup mmp_bringup.launch
Subsequently, execute the GO1 demo package:
rosrun go1_demo demo.py
You can input commands to navigate to pre-defined poses like home, stand, left, right, etc.
4. Open Manipulator Powering Off
When shutting down the open manipulator driver, it is advisable to use the default home pose from Moveit to ensure it rests in a suitable standby position. Failure to do so may result in the Open Manipulator falling.
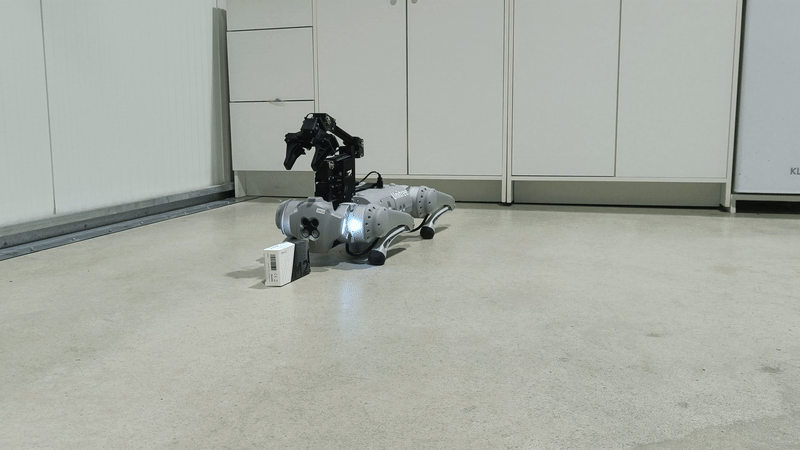
GO1 & Robosense LIDAR Operation

Note
These are found in the same GO1 repository under the github branch name melodic-robotis-robosense.
To launch the GO1 with the Robosense Lidar, use the following command:
roslaunch go1_lidar lidars.launch
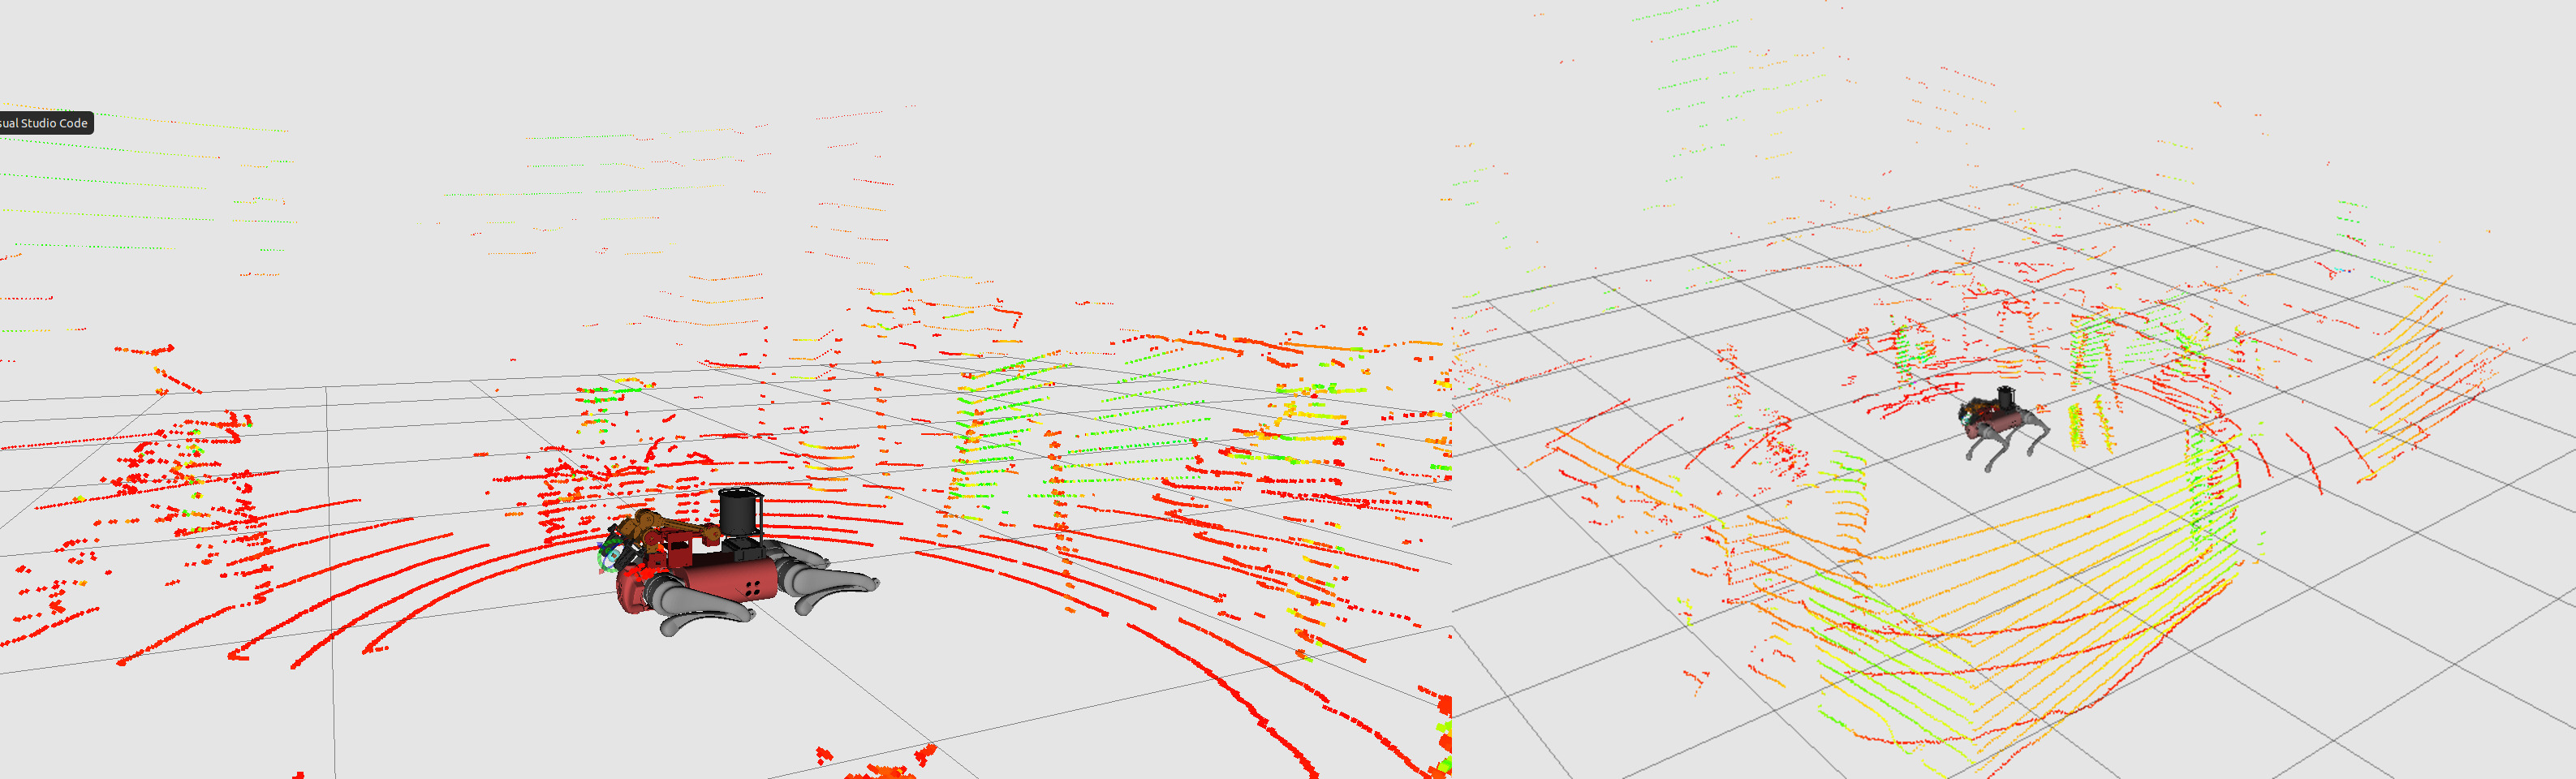
Running this command initiates the lidar driver connected to the robot, and you can observe the point cloud generated by that lidar by executing the visualization command:
roslaunch gi1_viz view_moveit.launch
GO1 Camera
For this, a ROS multi-machine setup is required. Clone this package to the three Nvidia boards on the GO1 with the IP addresses 192.168.123.13, 192.168.123.14, and 192.168.123.15 respectively. When used in conjunction with robot upstart (not covered here yet), it should start up every time the robot boots.
Note
The default camera driver auto-startup on each Nvidia needs to be disabled.
To set up multi-machine functionality, add the client PC details from the code above to the .bashrc file. Replace the IP 192.168.123.— with the Nvidia IP, which can be found using ifconfig (e.g., 13 in this case).
1. Disable Camera Driver startup
Run this on the PC and unlink the camera driver
gnome-session-properties
In some versions
./Unitree/autostart/camerarosnode/cameraRosNode/kill.sh
3. GO1 Service Examples
This requires the go1 driver to be running, either bringup.launch or mmp_bringup.launch.
GO1 Stand Down Position
rosservice call /set_mode "mode: 5
gait_type: 0"
With go1 namespace (used in open manipulator):
rosservice call /go1/set_mode "mode: 5
gait_type: 0"
GO1 Force Stand Position
rosservice call /set_mode "mode: 6
gait_type: 0"
With go1 namespace (used in open manipulator):
rosservice call /go1/set_mode "mode:
6 gait_type: 0"
GO1 Return to Walk Mode Control
rosservice call /set_mode "mode: 2
gait_type: 1"-----------
With go1 namespace (used in open manipulator):
rosservice call /go1/set_mode "mode: 2
gait_type: 1"
GO1 Gazebo
Launch Simulation
roslaunch go1_gazebo gazebo.launch
Unpause simulations by pressing the play button. GO1 (simulation) can be teleoperated via:
rosrun teleop_twist_keyboard teleop_twist_keyboard.py cmd_vel:=/go1/cmd_vel
Gaits are untuned and can be changed via go1_gazebo/config/gait/gait.yaml.
GO1 Multimachine — Cameras
To use rviz on your pc for faster updates please setup the multimachine.
1. Multi Machine - Host
For all the terminals on your PC (4-5 recommended), export the following environment variables. The IP should correspond to the IP address of your current host obtained from sudo nmtui or ifconfig.
export ROS_MASTER_URI=http://192.168.123.1:11311
export ROS_HOSTNAME=192.168.123.1
export ROS_IP=192.168.123.1
2. Multimachine - Client
For all the terminals on the robot’s PC, export these environment variables. The ROS master should correspond to the Multi Machine - Host, whereas the ROS IP and ROS hostname should correspond to the robot’s IP.
Nvidia 192.168.123.13
export ROS_MASTER_URI=http://192.168.123.1:11311
export ROS_HOSTNAME=192.168.123.13
export ROS_IP=192.168.123.13
Nvidia 192.168.123.14
export ROS_MASTER_URI=http://192.168.123.1:11311
export ROS_HOSTNAME=192.168.123.14
export ROS_IP=192.168.123.14
Nvidia 192.168.123.15
export ROS_MASTER_URI=http://192.168.123.1:11311
export ROS_HOSTNAME=192.168.123.15
export ROS_IP=192.168.123.15
Please note that you should ideally have the go1 description and go1_viz ROS packages built on your PC so that you may view the robot over the network.
3. Multimachine Usage
On the robot, launch:
roslaunch go1_bringup bringup.launch
On the user’s PC, launch:
roslaunch go1_viz view_robot.launch
1. Control OpenManipulator
roslaunch go1_gazebo open_manipulator_control.launch
Press the timer start to use the GUI buttons. It is also possible to control via the joint_command topics.
GO1 & Open Manipulator Caution
Dynamixel Error:
Power cycle the adapter.
Run sudo chmod a+rw /dev/ttyUSB0.
Robot Joint States Not Showing Up:
Ensure the robot has fully booted up.
Connect the LAN cable after the robot has booted, especially if using DHCP.
GO1’s Motion Planning Issue with ROS Multimachine:
Wait for the robot to fully boot up before connecting the LAN cable, especially if using DHCP.
Use ROS Melodic when interfacing with ROS on GO1 (applicable only for GO1 with Manipulator).
Open Manipulator Falling on the Robot:
Execute the home pose from Moveit to position the gripper in a standby position.
GO1 & Open Manipulator Safety Guidelines
When deploying robotic manipulators, prioritizing safety procedures is crucial to mitigate risks and ensure secure operations. The following guidelines outline key safety measures when working with robotic manipulators:
1. Work Area Safety
Maintain a clean and well-organized work area to ensure proper sensor functioning and precise manipulation, avoiding clutter and inadequate lighting.
Avoid operating robotic manipulators in hazardous environments with corrosive substances, extreme temperatures, or sharp objects.
Ensure only authorized personnel are present during manipulator operation to prevent interference and maintain a safe working environment.
2. Electrical Safety
Ensure the manipulator’s power system adheres to electrical safety standards, conducting regular inspections and maintenance.
Implement safeguards to protect the manipulator from adverse environmental conditions like moisture or extreme temperatures.
Regularly inspect power cables and connections, promptly replacing damaged components to minimize electrical risks.
3. Manipulation Safety
Implement collision detection systems to prevent unintended contact with objects, humans, or other equipment during manipulation tasks.
Define and enforce safety zones around the manipulator’s workspace to minimize the risk of unintended interactions.
Regularly calibrate and test the manipulator’s sensors and systems for precise and reliable performance during manipulation tasks.
4. Emergency Response
Install an emergency stop mechanism to swiftly halt manipulator operation in unforeseen circumstances or emergencies.
Clearly mark and communicate emergency stop locations within the manipulator’s operational area.
Conduct regular emergency response drills to ensure personnel are familiar with procedures during unexpected situations.
5. Data Security and Privacy
Implement robust cybersecurity measures to safeguard the manipulator’s control systems and data from unauthorized access or manipulation.
Ensure compliance with privacy regulations when collecting, storing, or transmitting data captured by the manipulator’s sensors.
6. Human Interaction Safety
Integrate sensors and communication systems to detect and respond to the presence of humans in the manipulator’s vicinity.
Clearly communicate the manipulator’s operational status and intentions using visual and audible signals to alert nearby individuals.
Establish protocols for safe human-robot collaboration, particularly in shared workspaces where manipulators are in operation.
7. Residual Risks
Despite the implementation of safety measures, certain residual risks may persist. These include:
Impairment of sensor functionality.
Risk of collisions during complex manipulation tasks.
Cybersecurity vulnerabilities.
Unintended human interactions due to unforeseen circumstances.
Robotic manipulators are sophisticated technologies that require correct usage to avoid accidents and ensure a secure environment. Learn and adhere to proper procedures diligently, prioritizing both precision and safety.
GO1 Safety Guidelines
When deploying autonomous mobile robots, prioritizing safety procedures is essential to prevent accidents and ensure secure operations. The following guidelines outline key safety measures when working with an autonomous mobile robot:
1. Work Area Safety
Maintain a clean and well-lit work area. Cluttered or poorly illuminated spaces can impede the proper functioning of sensors and navigation systems.
Avoid operating autonomous mobile robots in explosive atmospheres, such as areas with flammable liquids, gases, or dust. The robot’s components may pose a risk in such environments.
Keep bystanders and unauthorized personnel at a safe distance during robot operation to prevent interference with autonomous navigation.
2. Electrical Safety
Ensure the robot’s power system adheres to electrical safety standards. Regularly inspect and maintain power components to prevent malfunctions.
Implement mechanisms to protect the robot from adverse weather conditions, such as rain or wet environments.
Regularly inspect power cables and connections and replace damaged components promptly to minimize the risk of electrical issues.
4. Emergency Response
Install an emergency stop mechanism to quickly halt the robot’s operation in case of unforeseen circumstances or emergencies.
Clearly mark and communicate emergency stop locations throughout the robot’s operational area.
Conduct regular emergency response drills to ensure personnel are familiar with procedures for handling unexpected situations.
5. Data Security and Privacy
Implement robust cybersecurity measures to protect the robot’s control systems and data from unauthorized access or manipulation.
Ensure compliance with privacy regulations when collecting, storing, or transmitting data captured by the robot’s sensors.
6. Human Interaction Safety
Integrate sensors and communication systems to detect and respond to the presence of humans in the robot’s vicinity.
Clearly communicate the robot’s operational status and intentions using visual and audible signals to alert nearby individuals.
Establish protocols for safe human-robot collaboration, especially in shared workspaces.
7. Residual Risks
Despite the implementation of safety measures, certain residual risks may persist. These include:
Impairment of sensor functionality.
Risk of collisions in crowded or dynamic environments.
Cybersecurity vulnerabilities.
Unintended human interactions due to unforeseen circumstances.
Autonomous Mobile Robots (AMR) are advanced technologies that require correct usage to avoid accidents and ensure a secure environment. Learn and follow the proper procedures diligently; prioritize both quality and safety.