G1 Manuals

The following text contains hyperlinks. Click on them to be redirected to the websites.
G1 Mobile Apps
The QR codes for Android and iOS to download the G1 app are provided below. Please scan the respective QR code to access the download link.

Scan to download for Android |

Scan to download for iOS |
G1 Itinerary and Transport
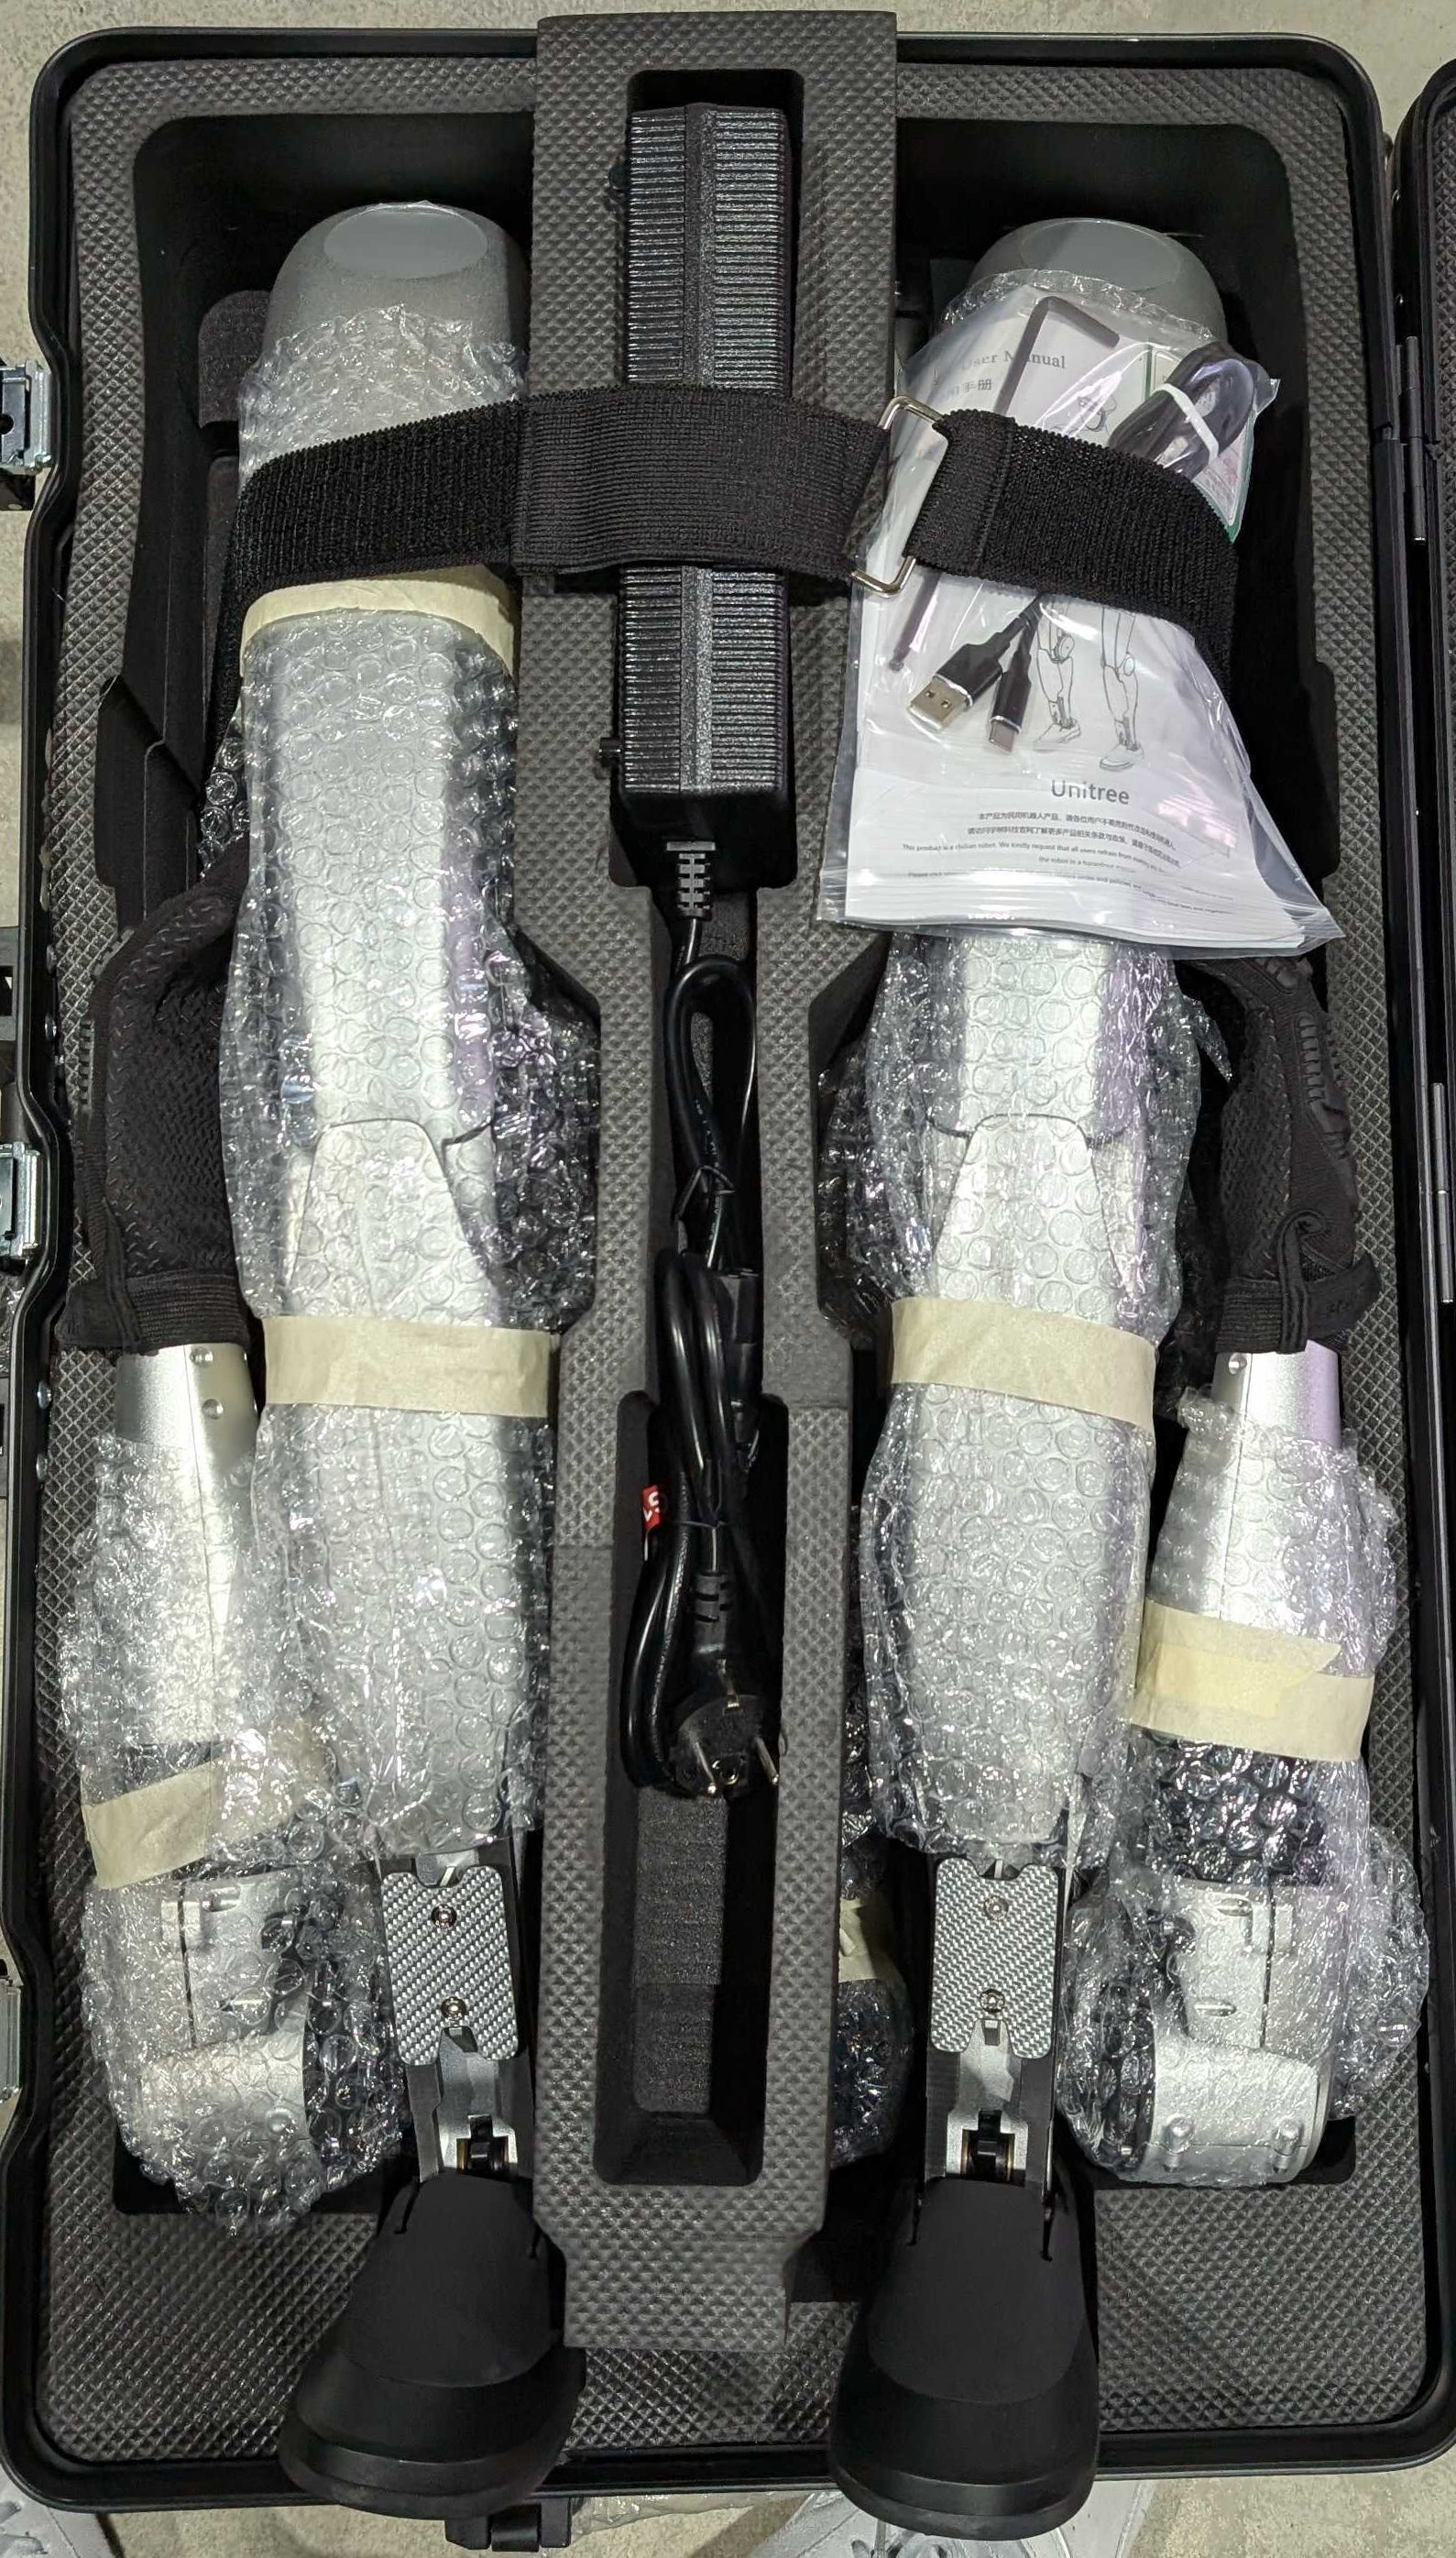
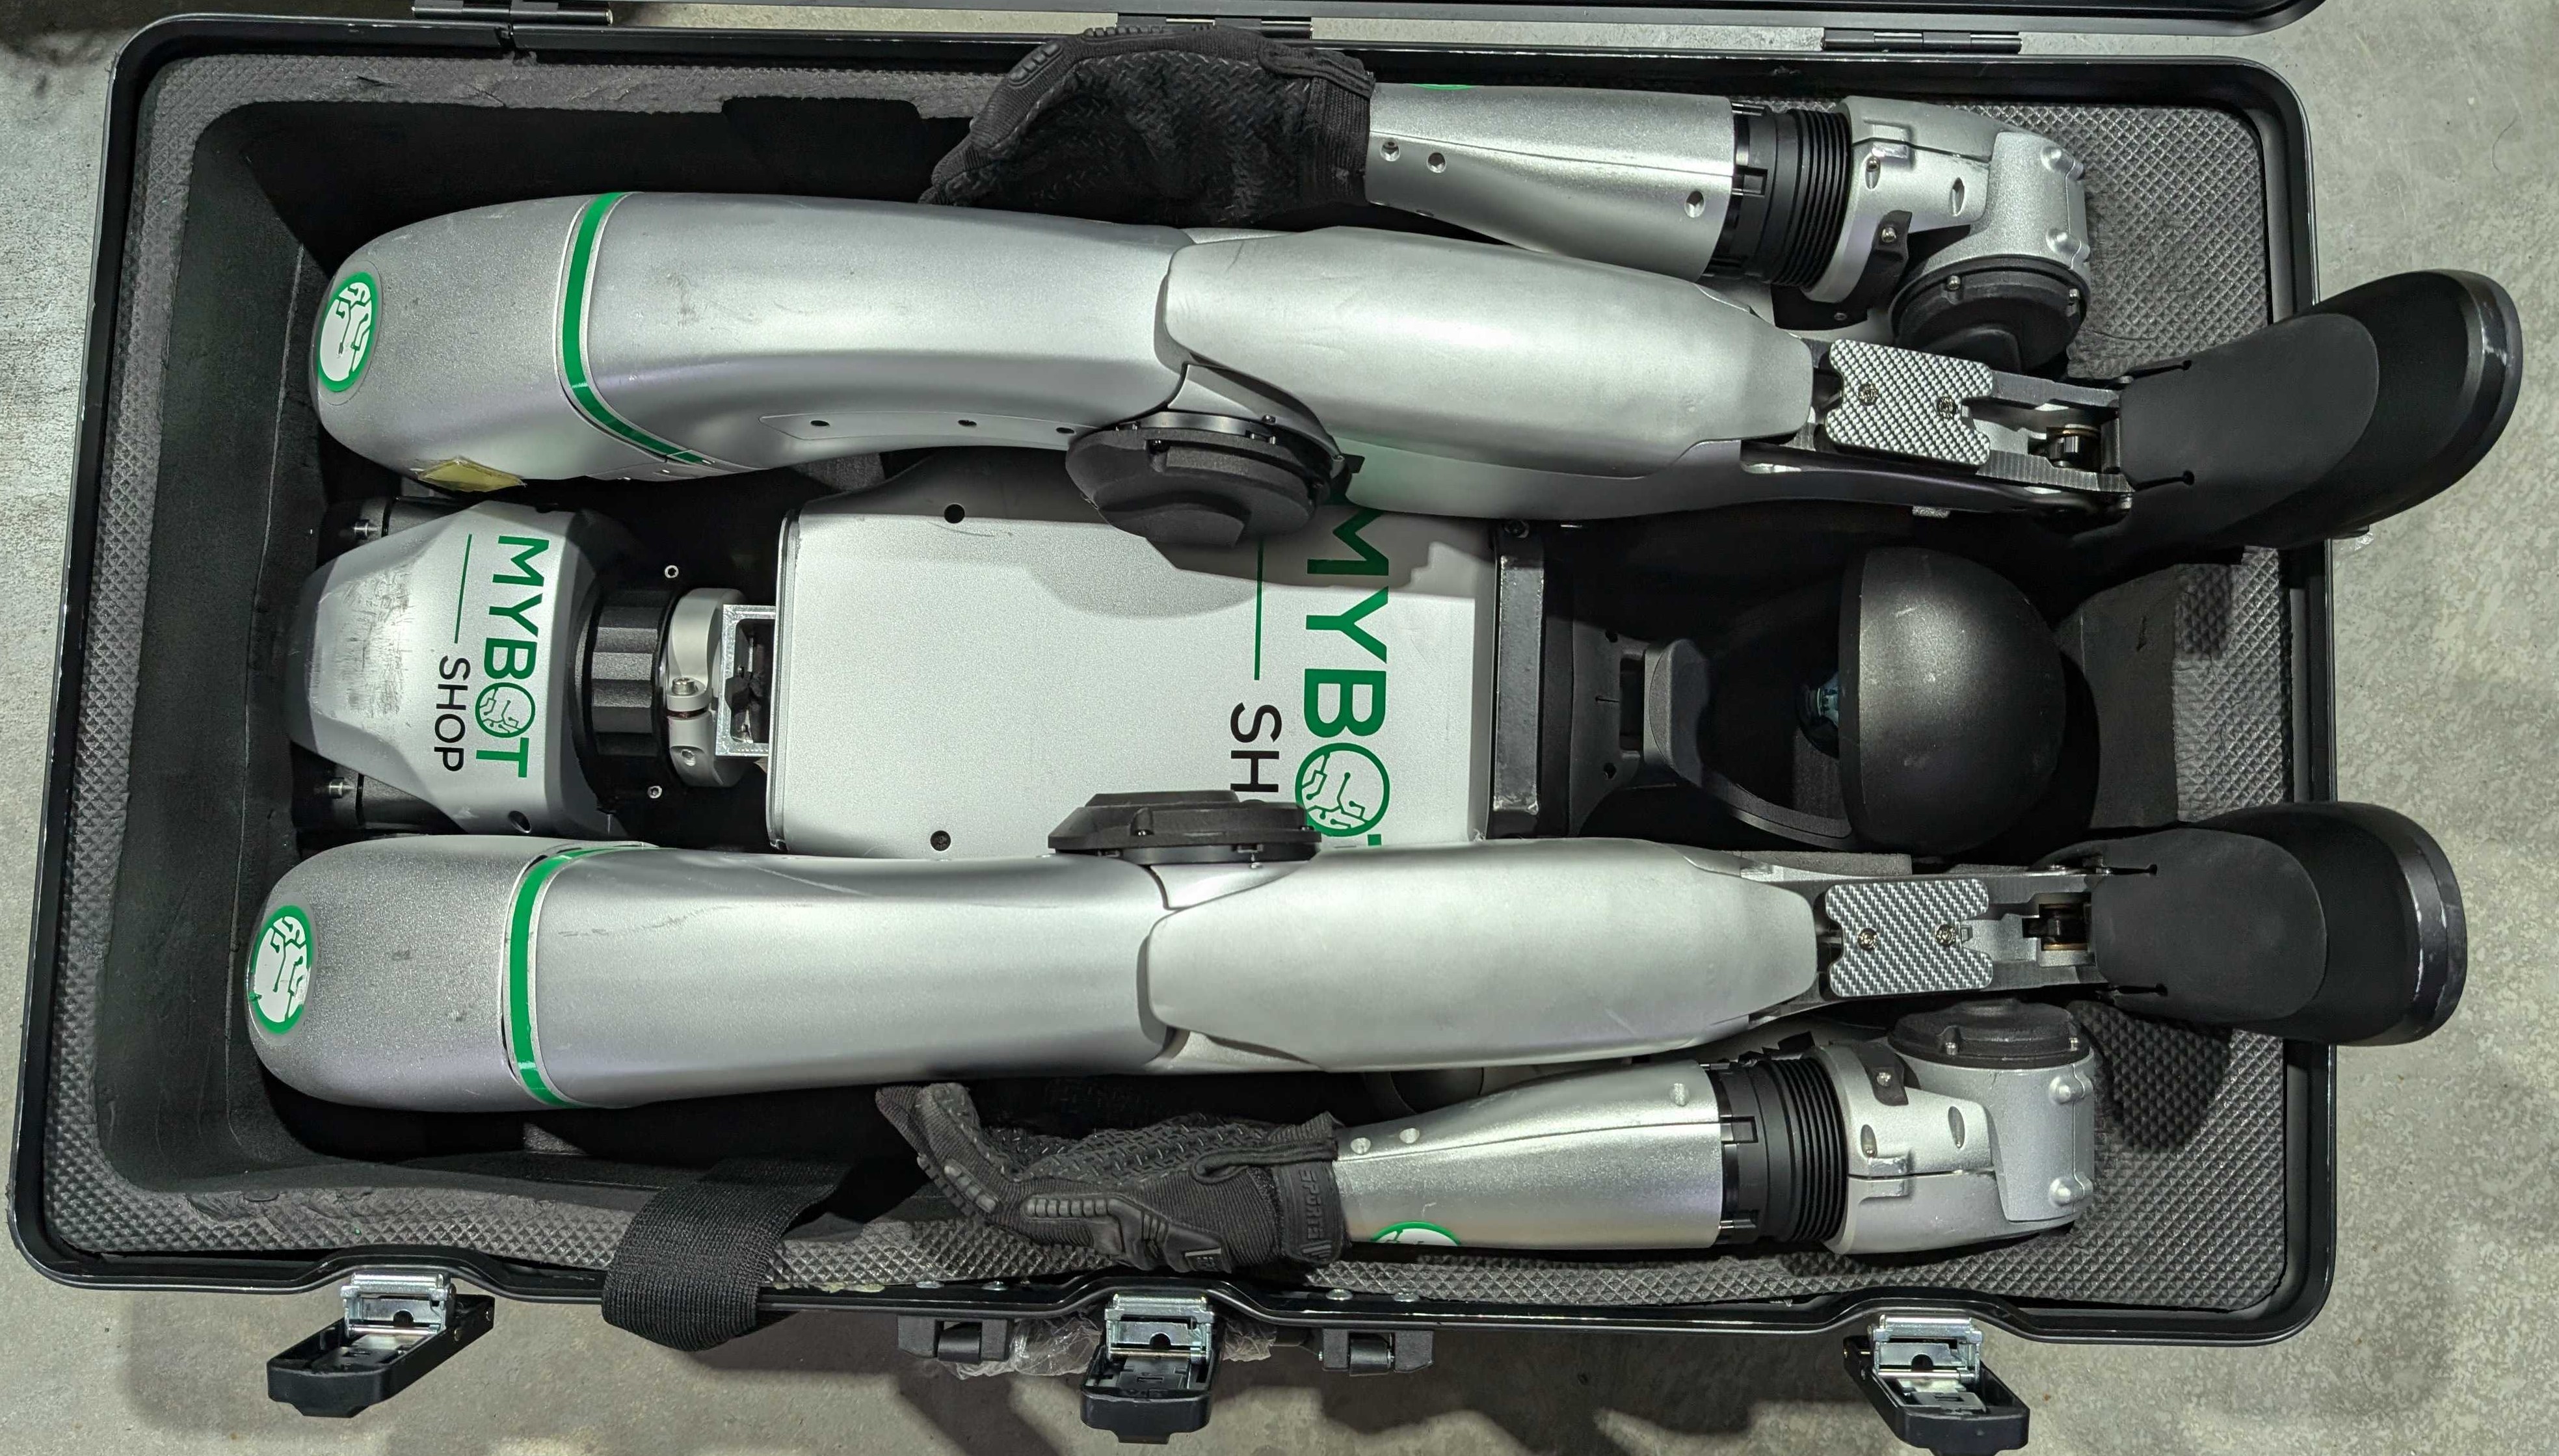
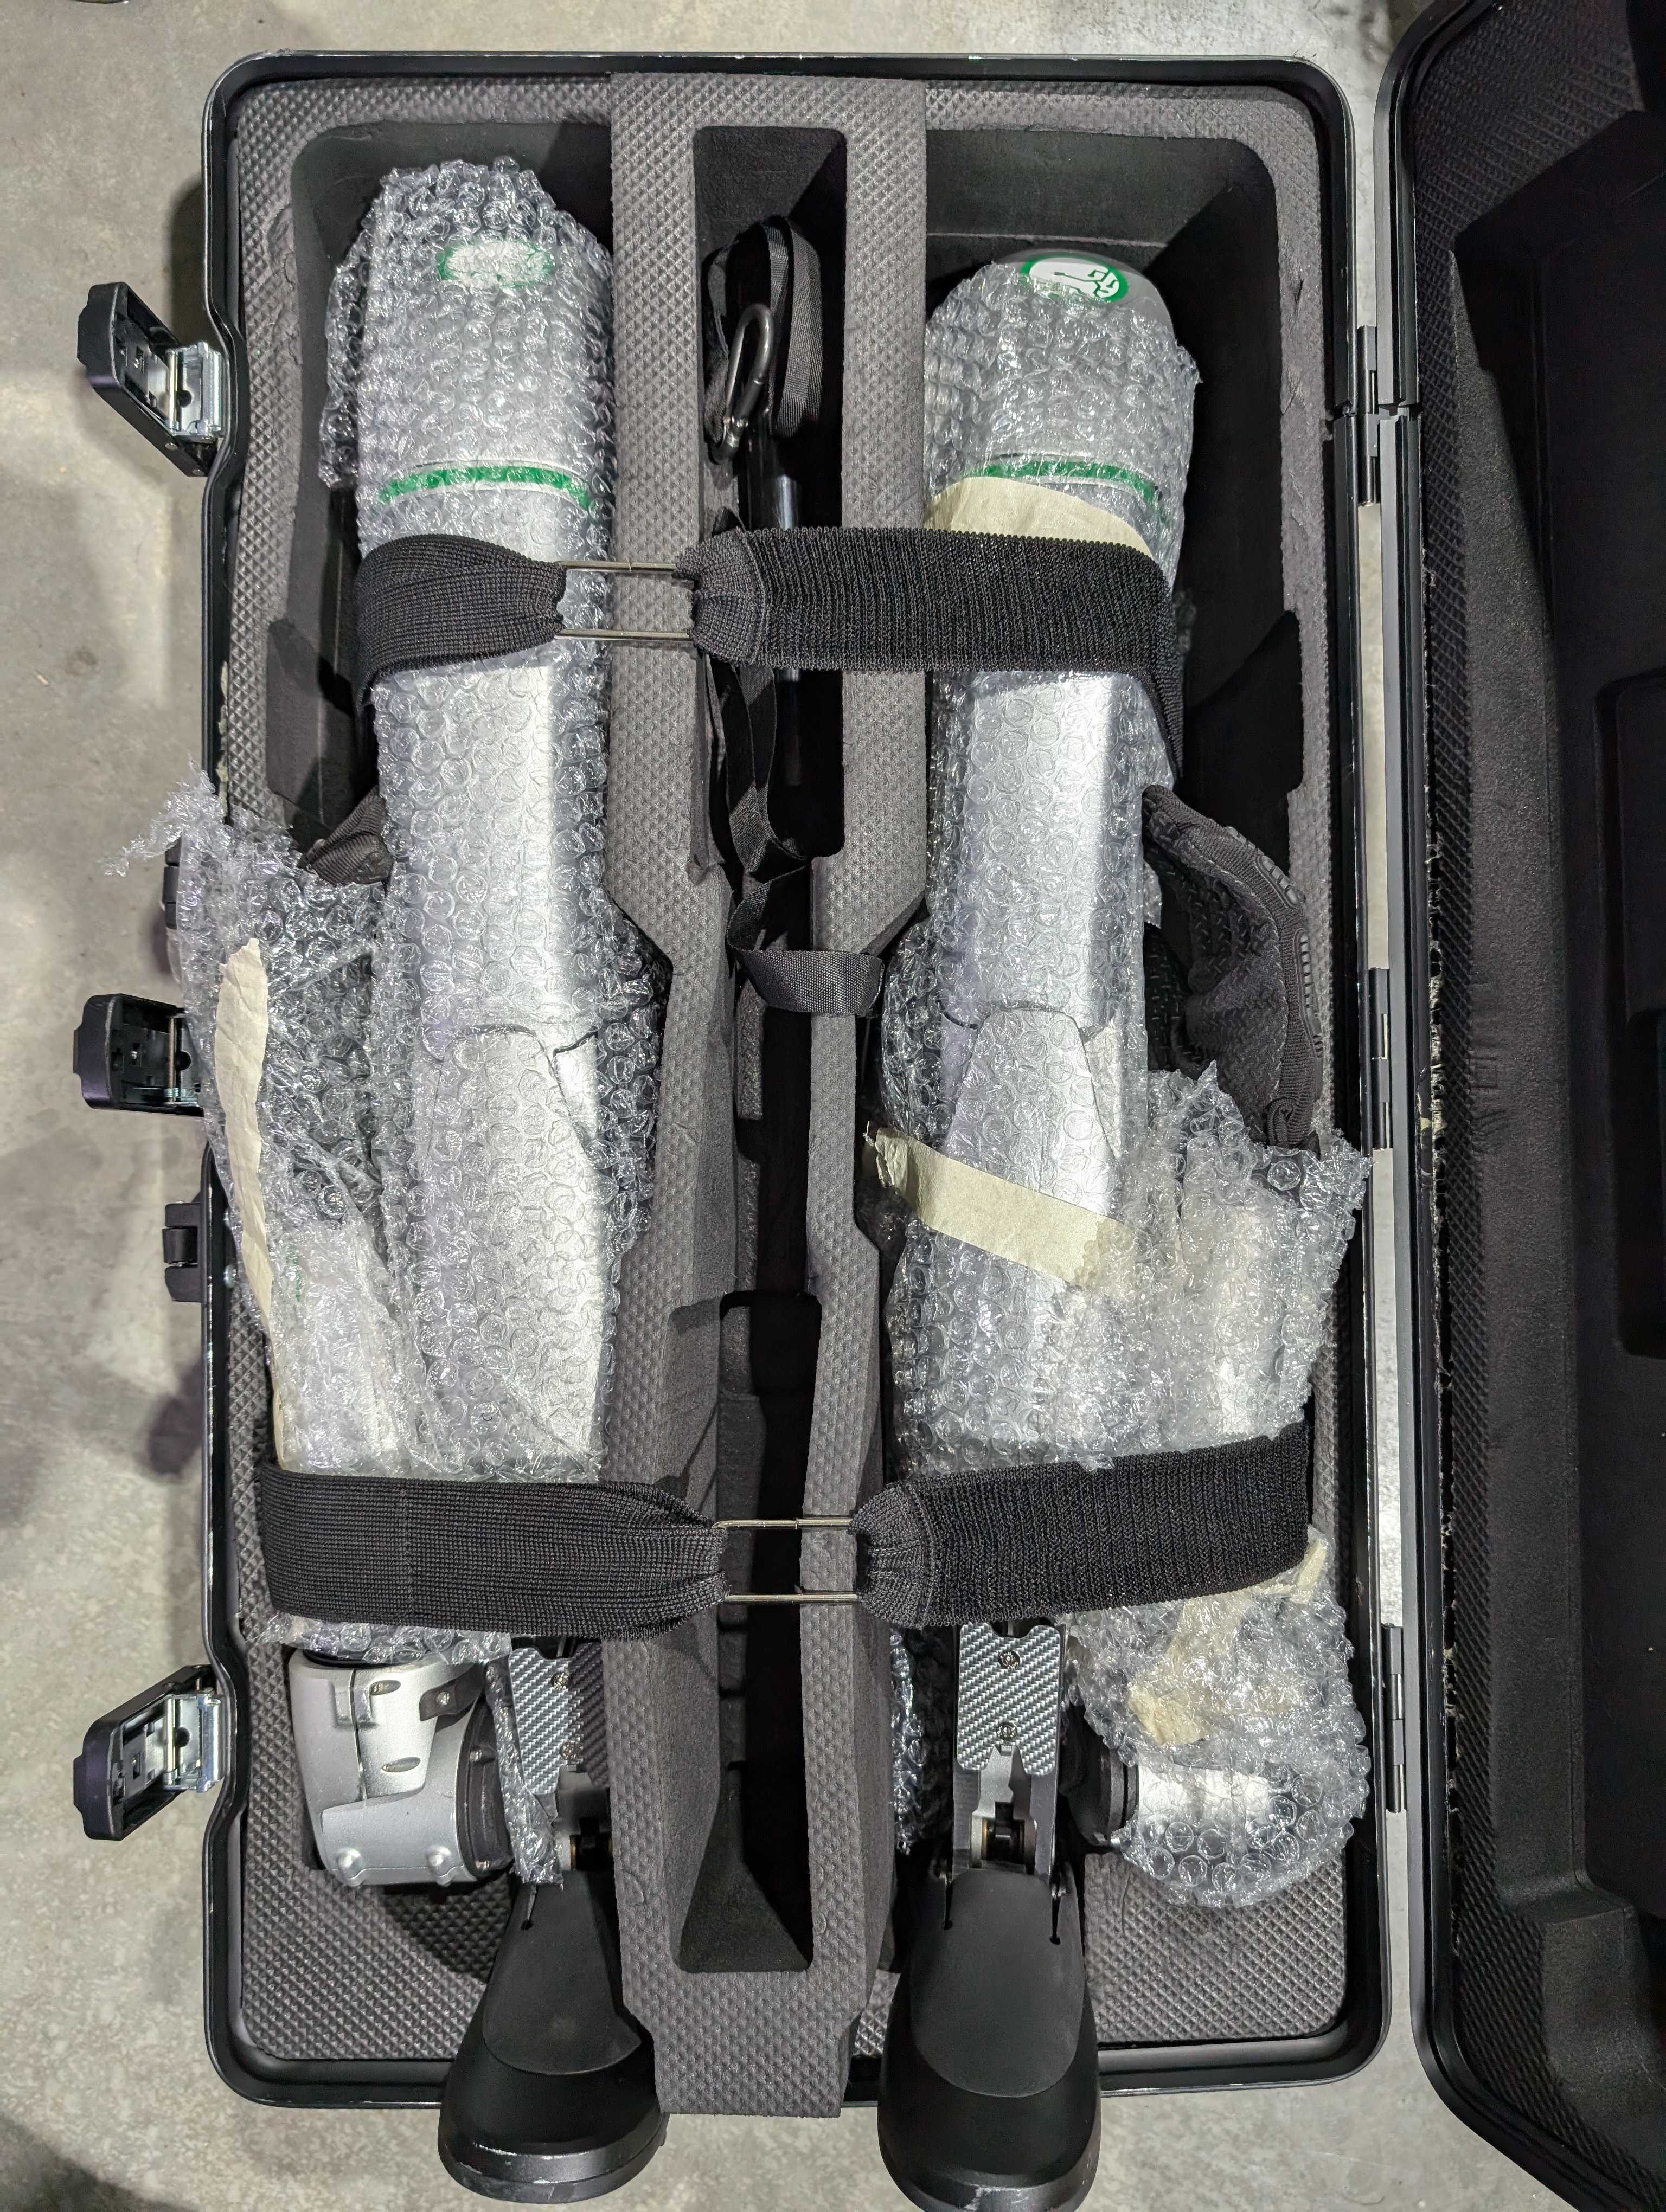
The G1 humanoid robot is designed with a compact and lightweight structure, making it easy to transport and handle. Its foldable design allows it to be neatly stored in the provided suitcase, which includes the Unitree G1 humanoid robot, a remote controller, and a charger. While the suitcase ensures convenience, its built-in wheels are not suitable for outdoor use. Therefore, it is recommended to use an additional trolley for enhanced mobility, particularly in outdoor environments. This combination of thoughtful design and practical packaging ensures that the G1 stands out as a highly portable option compared to other humanoid robots, offering both ease of transport and reliable protection for its components.

|
|

G1 Trolley for Easy Transport
Note
Always handle the suitcase with care to prevent damage to the robot and accessories during transport.
G1 Charging
Proper charging procedures are essential to ensure the safe and efficient operation of your Unitree G1 Humanoid Robot. Follow the guidelines below for charging the main battery and the companion remote control.
Battery Charging
Due to self-discharge during transportation and storage, the battery may have low or no power initially. Use the following steps to charge the main battery:
Remove the battery: Detach the battery from the G1 body. Ensure the battery pack strap is pulled out.
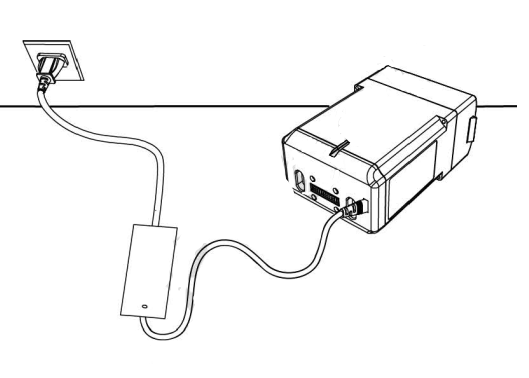
Prepare the charger:
Connect the charger to an AC power source (100-240V, 50/60Hz).
Verify that the external power supply voltage matches the charger’s rated input voltage (marked on the charger’s nameplate). Failure to match voltages may damage the charger.
Connect the battery:
Plug the charger into the AC power supply first.
Ensure the battery pack is switched off before connecting it to the charger to avoid damage.
Monitor charging status:
During charging, the battery indicator on the battery pack will flash at a frequency of 1Hz (once per second), displaying the current charge level.
When fully charged, the battery indicator will turn off. Manually disconnect the charger and battery to complete the process.
Temperature precautions:
Allow the battery to cool to room temperature before charging if it is warm from recent use.
Warning
Only use official chargers to charge the G1 battery. Using unofficial chargers may cause damage or safety hazards.
Remote Control Charging
The companion remote control requires proper charging to maintain functionality. Follow these steps:
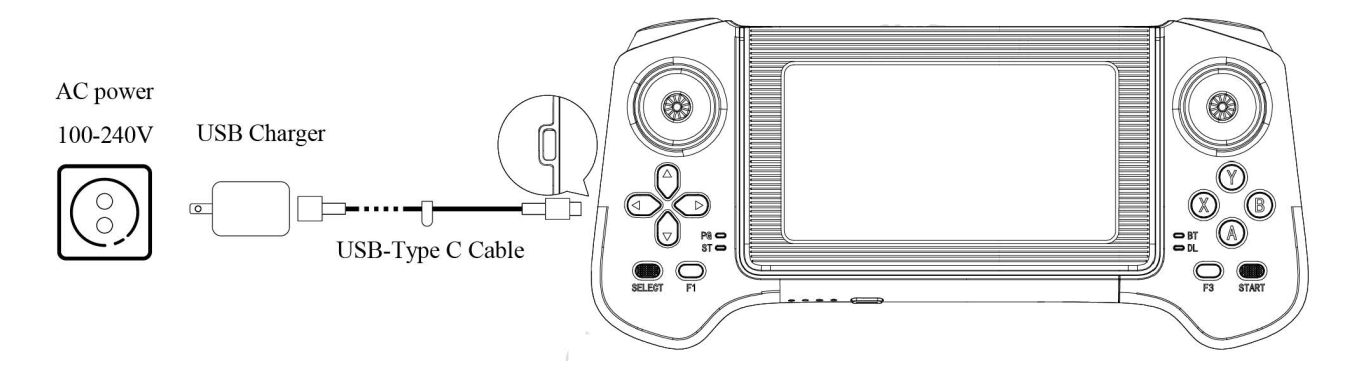
Use a 5V/2A USB charger that meets FCC/CE standards.
Ensure the remote control is switched off before charging.
Connect the remote control to the charger using a USB-Type C cable.
Observe the charging indicator light: - The power indicator will flash at 1Hz (once per second) during charging, showing the current charge level. - When the indicator turns off, charging is complete. Disconnect the charger.
Remote Charging Indicator
The charging indicator lights display the current charge level as shown in the table below:
Indicator Lights |
Current Battery |
Description |
|---|---|---|
LED1 |
0%-25% |
Lowest battery level |
LED1, LED2 |
25%-50% |
Partial charge |
LED1, LED2, LED3 |
50%-75% |
Moderate charge |
All LEDs |
75%-100% |
Fully charged |
Note
For optimal battery life, avoid overcharging and ensure all devices are disconnected after charging.
G1 Unpacking and Initial Setup
Follow the steps below to properly unpack and prepare the Unitree G1 Humanoid Robot for operation.
Unpacking
Place the box on a flat surface with the front side facing up.
Open the top of the box and carefully lift the robot out in its entirety.
Remove all components, including the robot, remote control, charger, and accessories.
Place the robot flat on a stable surface in preparation for powering it on.
Important
Handle all components with care to avoid damage during unpacking.
Pre-Power-On Checklist
Before powering on the G1, ensure the following:
Use only authentic Unitree Robotics parts and confirm that all parts are in good working condition.
Do not operate the robot if you are intoxicated, under the influence of drugs, or unable to concentrate.
Familiarize yourself with:
Characteristics of each gait mode.
The emergency braking method in case of instability or loss of control.
Check that there are no foreign objects (e.g., water, oil, sand, or soil) inside the robot or its components.
Ensure the remote control and battery pack are fully charged.
G1 Powering On
Attention
If the G1 enters an unexpected state, press L1 + A. The robot will enter damping mode and slowly fall to the ground.
Installing Battery Pack
Insert the battery into the battery compartment on the side of the robot.
Ensure the power switch faces the back of the robot.
If the battery does not fully insert, adjust its direction. Do not forcefully press it to avoid damaging the battery interface and buckle.
Listen for a “click” sound, indicating the battery is securely installed. Verify the buckle is in place.
Sit & Power On [Method 1]
Preparation Before Startup
If conditions permit, G1 supports booting while seated. Place G1 on a chair with arms and legs positioned naturally, as shown in the following image.
Powering On
Short-press the power button on the battery once.
Press and hold the power button for more than 2 seconds to power on the battery.
Successful Boot
Wait approximately 1 minute for the G1 to enter the zero torque state.
Press
L1 + Ato enter damping mode.Hold the G1’s shoulder and press
L1 + UPto help it enter the ready state.Once G1 straightens and stands, you can press:
R1 + XorR2 + Xto enter operation control state.
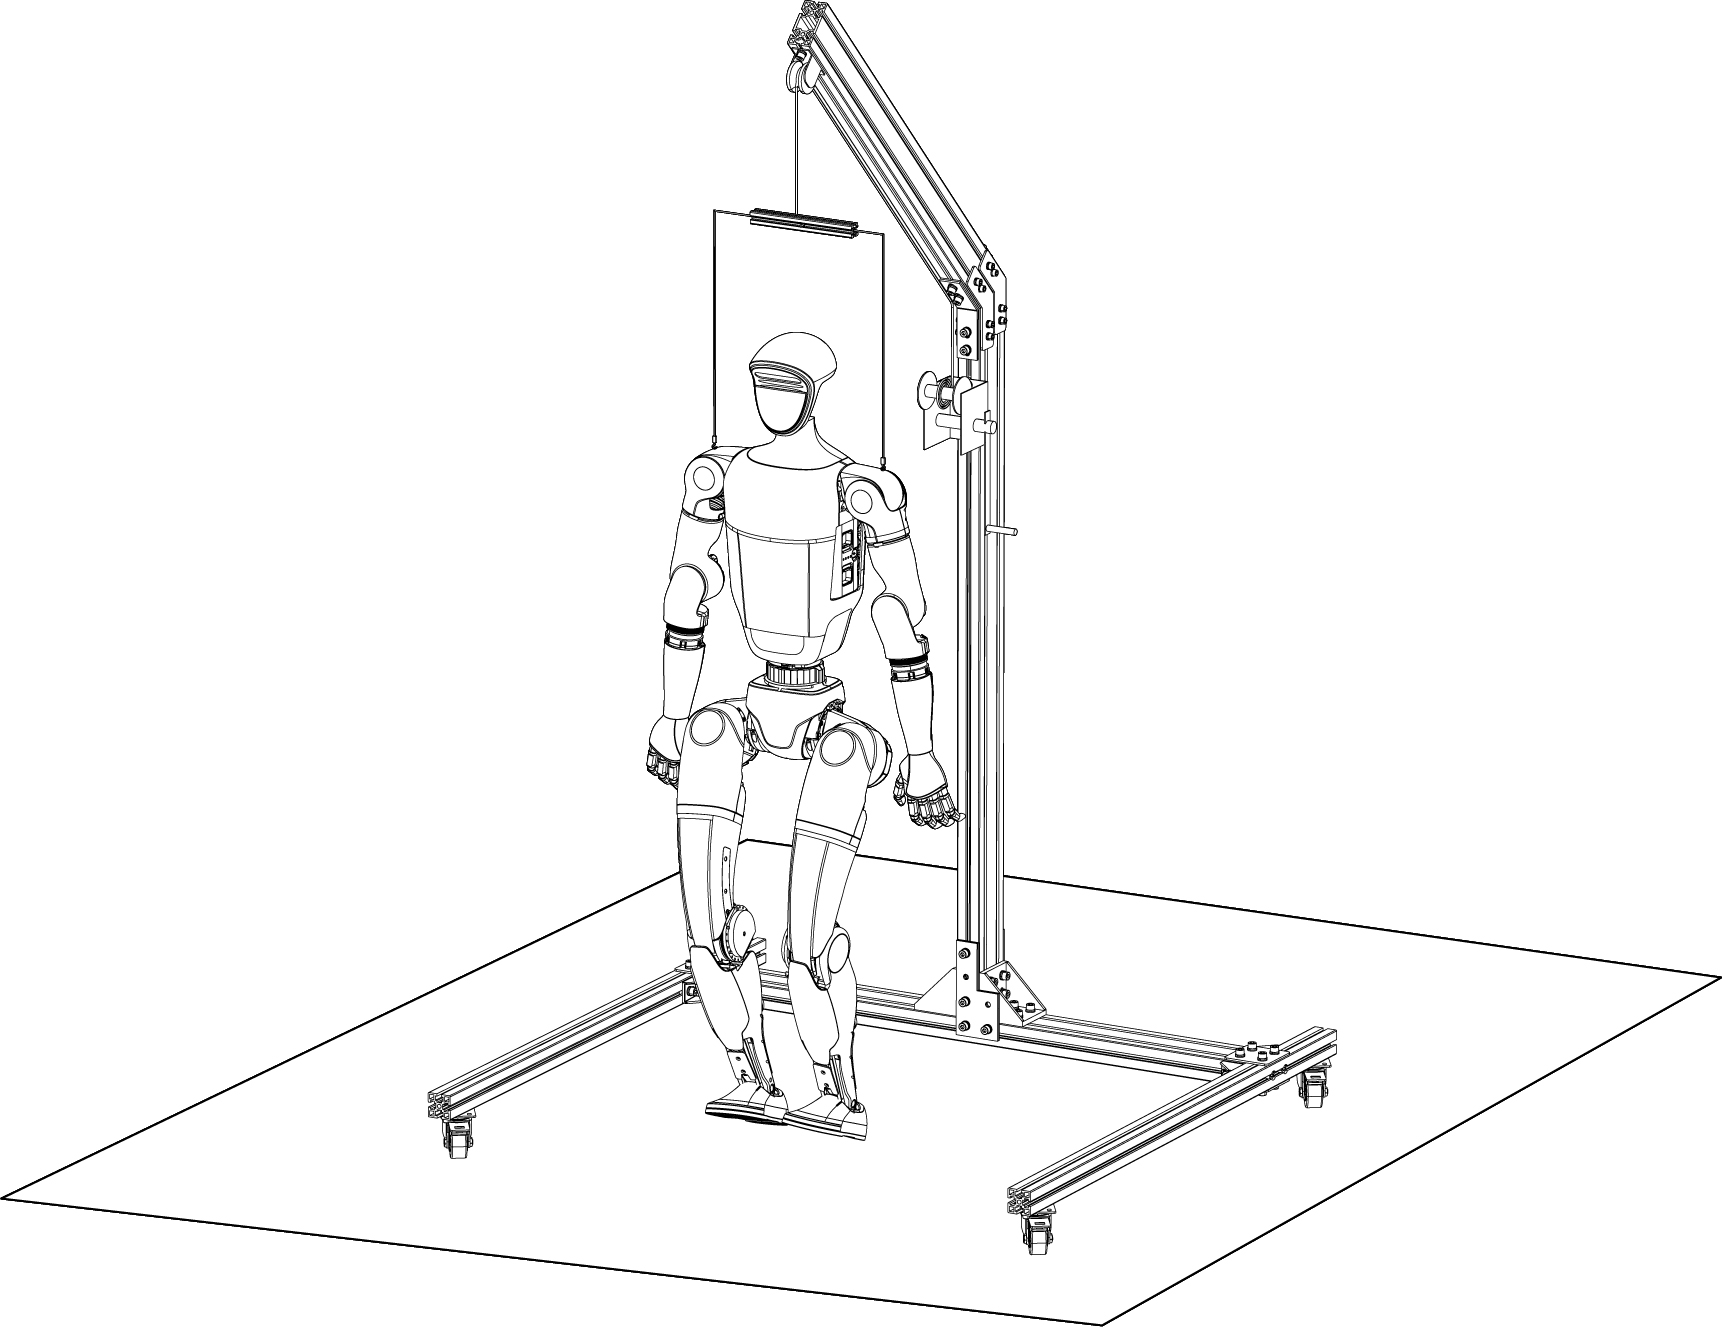
Hang & Power On [Method 2]
The following steps guide you through the process of hanging, preparing, and powering on the Unitree G1 Humanoid Robot.
Preparation Before Startup
Place the G1 steadily on the ground.
Thread a rope through the special suspension buckles located on both shoulders of the robot. Tie the rope securely with a dead knot.
Attach the rope to the suspension buckle of the protective frame.
Gradually raise the G1 by adjusting the support, ensuring the robot’s body is fully suspended and its feet do not touch the ground.

Body Placement
While hanging, position the robot’s arms and legs naturally.
Ensure the joints are not entangled before proceeding.
Starting Up the Robot
Short-press the power button on the battery once.
Press and hold the power button for more than 2 seconds to power on the battery.
Boot Process
The boot process takes approximately 1 minute.
When all joints enter the zero torque state, the initialization is successful.
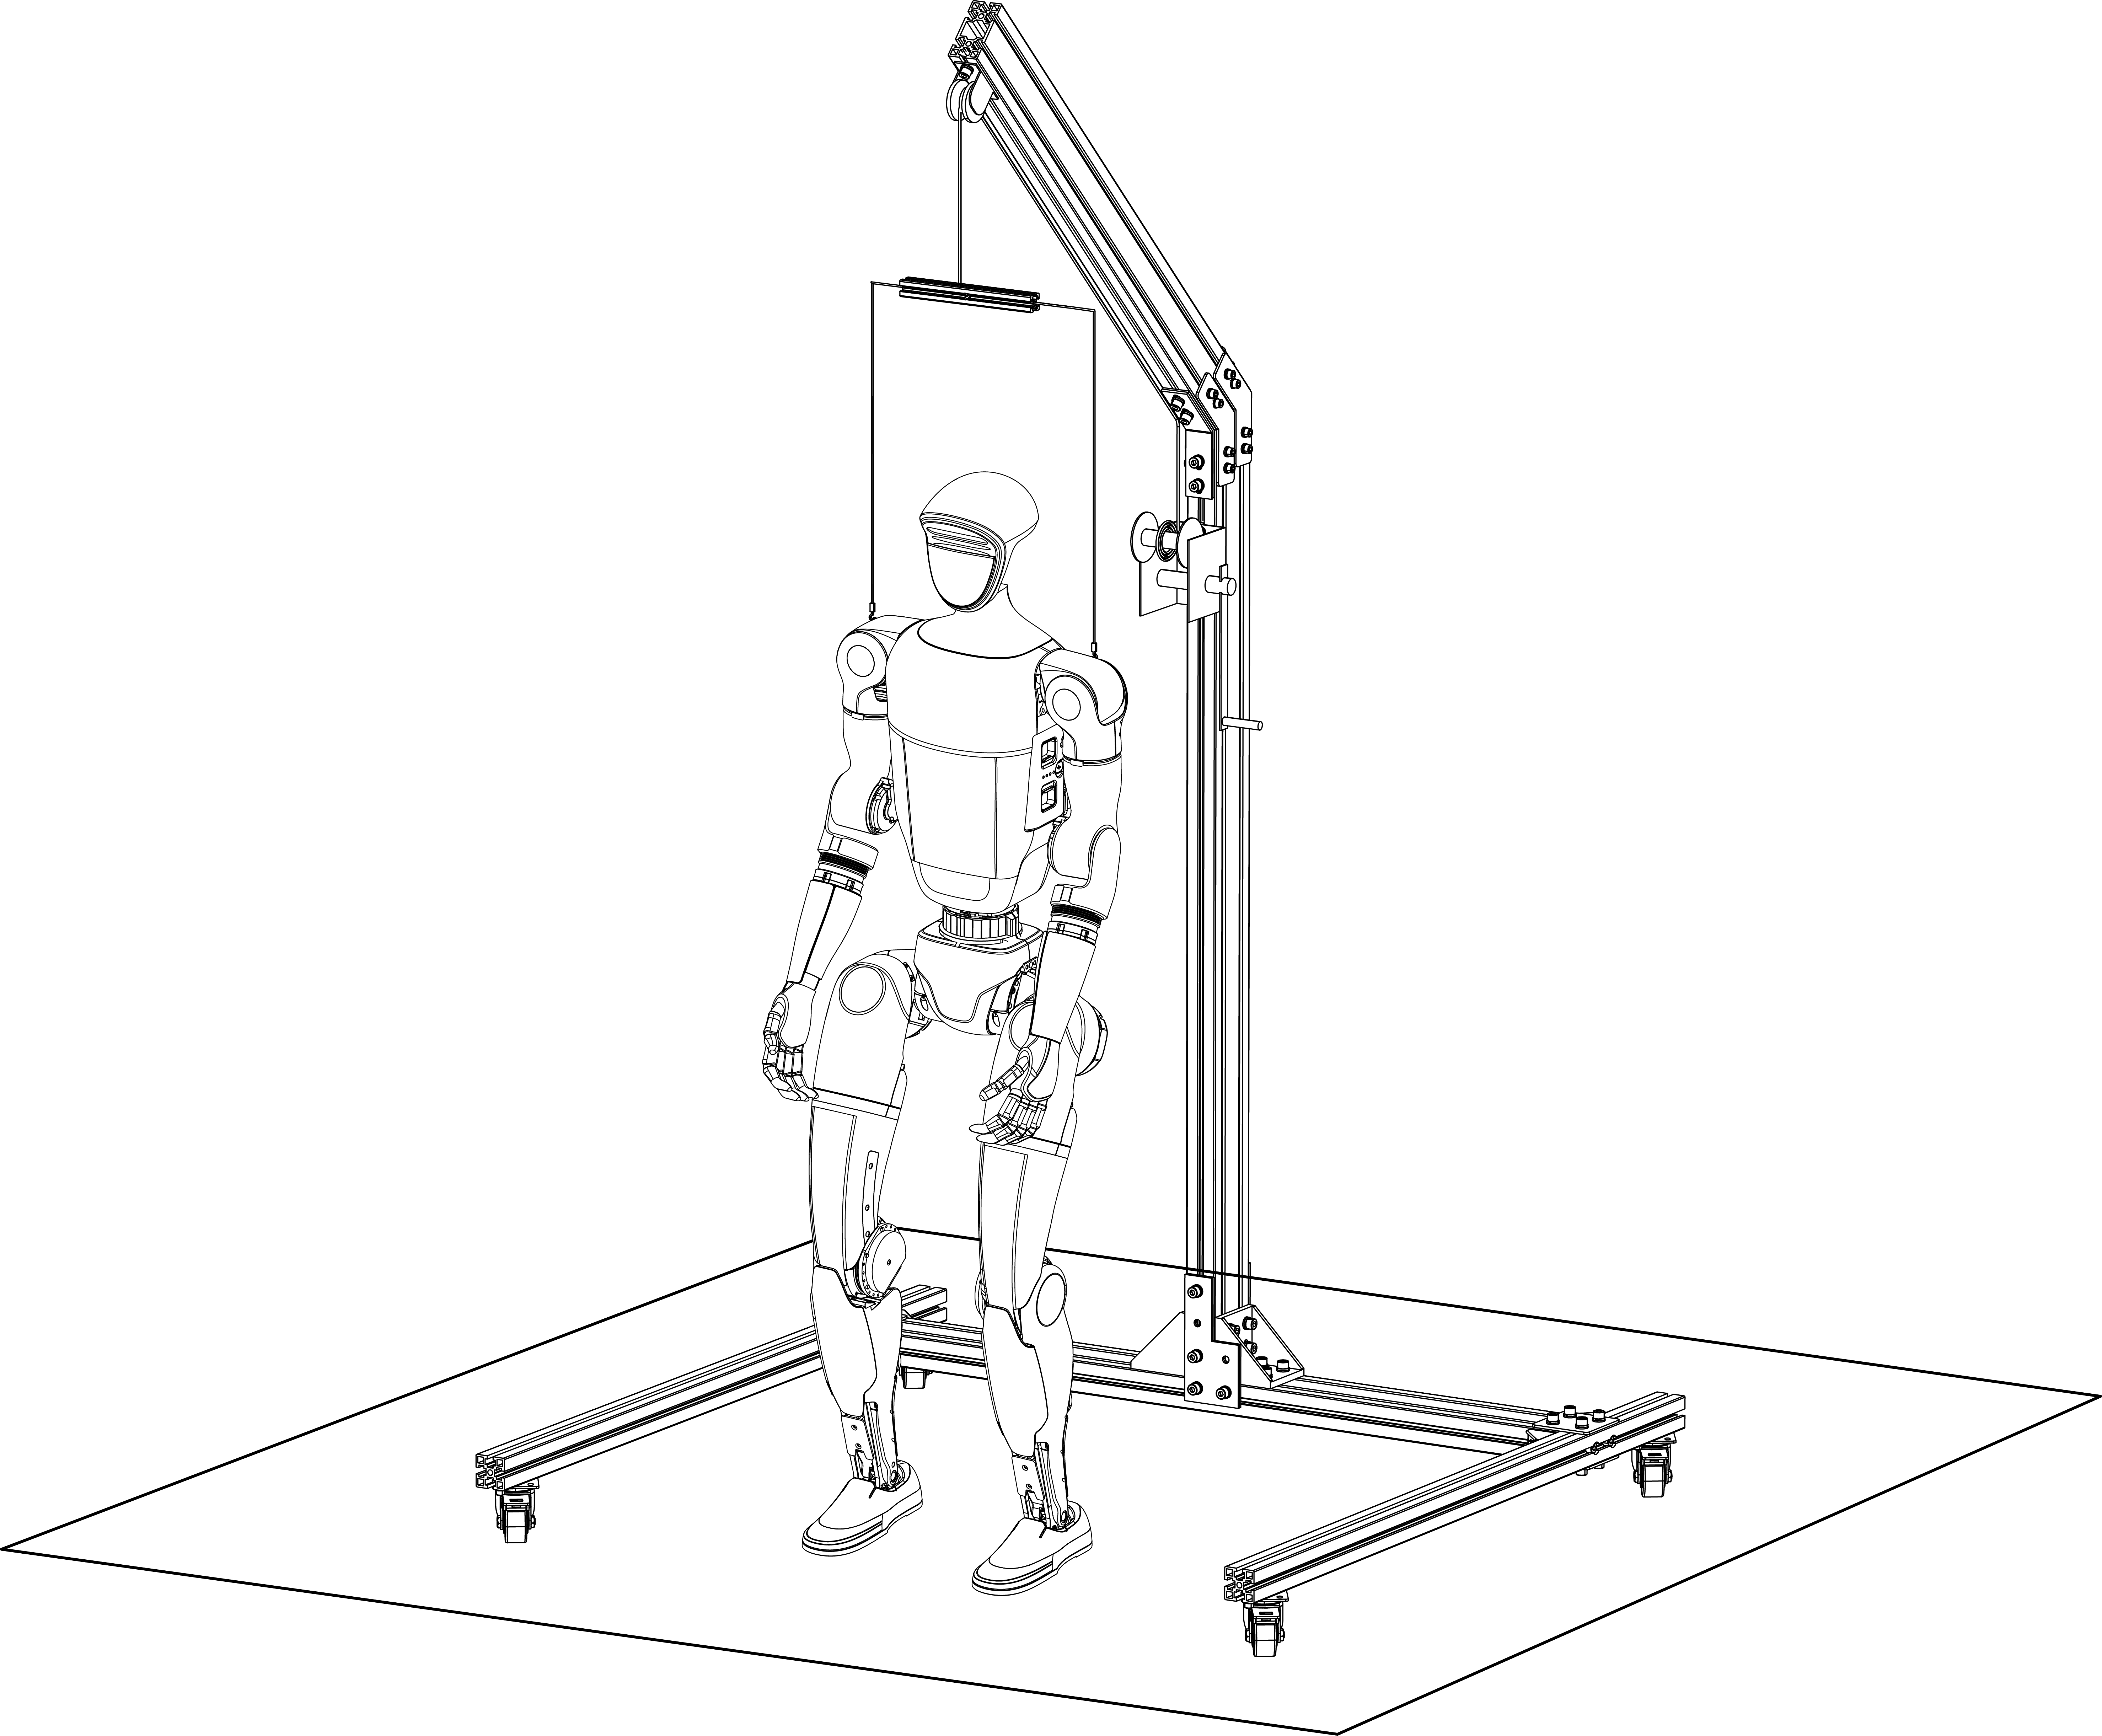
Use the remote control:
Press
L1 + Ato enter damping mode and unlock control.Press
L1 + UPto enter the ready state.
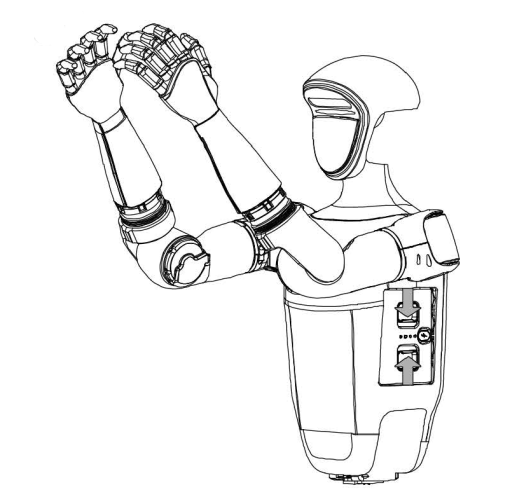
The G1 will assume a neutral posture, as shown in the following image.
Lowering and Activating the Robot
Gradually lower the suspension rope until the G1’s feet touch the ground.
Press
R1 + Xon the remote control.The control program will start, transitioning G1 from the ready state to the motion state.
Allow the robot to stabilize its movement.
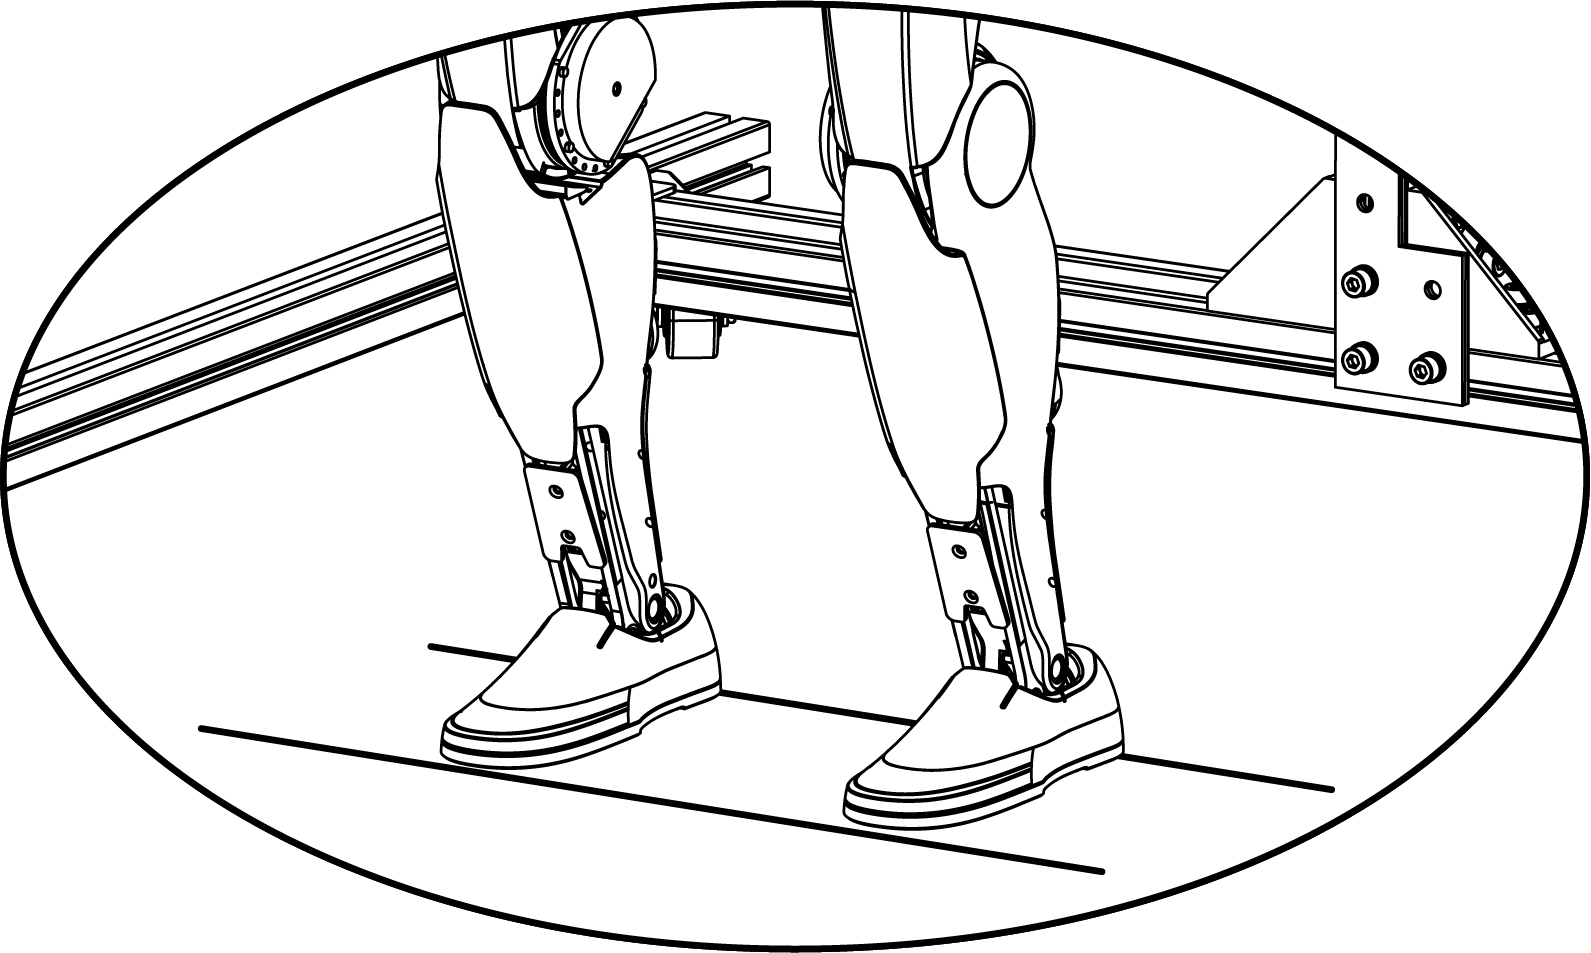
Unlocking the Hanging Rope
Once the G1 is stable, fully release the suspension hook.
Use the left and right joysticks on the remote control to control the G1’s movements.
Press START on the remote to switch between standing and walking states.

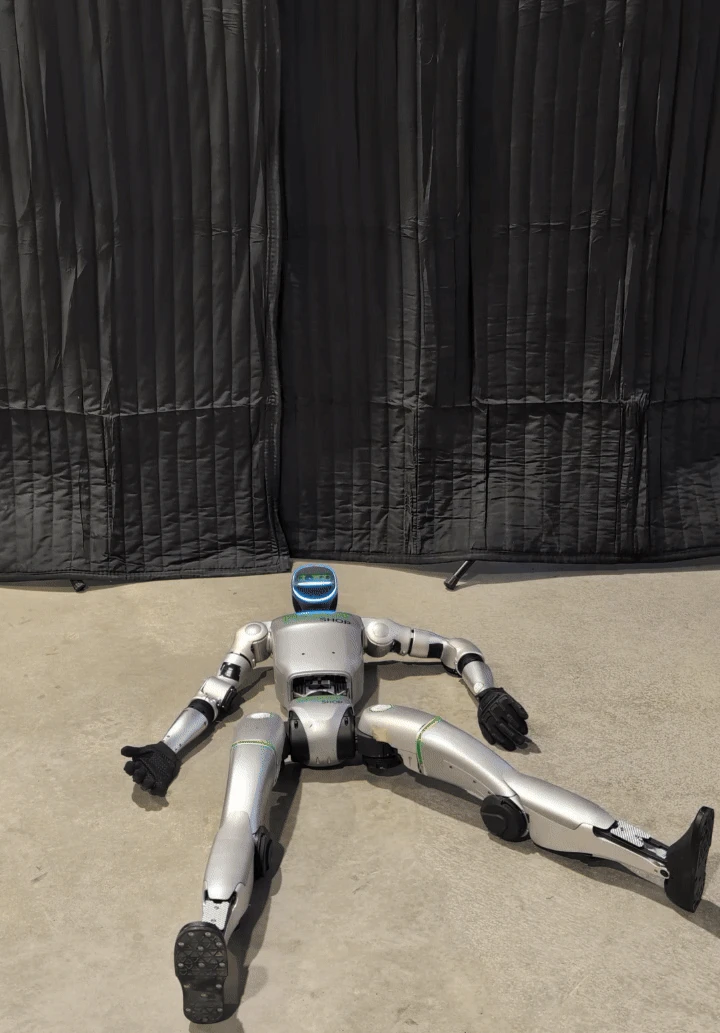
Start from Ground [Method 3]
Follow these steps to safely start up the G1 robot from a grounded position.
Preparation Before Startup
Place the G1 steadily on the ground Facing Up.
Ensure the joints are not entangled before proceeding.
Always ensure the robot is on a stable, non-slippery surface to prevent accidental falls or damage.
Starting Up the Robot
Short-press the power button on the battery once.
Press and hold the power button for more than 2 seconds to power on the battery.
Boot Process
The boot process takes approximately 1 minute.
When all joints enter the zero torque state, the initialization is successful.
Using the Remote Control
Press
L1 + Ato enter damping mode and unlock control.Press
L1 + Xto activate the Lying Down and Standing Up Mode.
Attention
Maintain a safe distance as the robot will start to get up on its own.
The G1 will rise from the ground, as illustrated in the following GIF:
Emergency Stop
If the G1 enters an unexpected state, press L1 + A. The robot will enter damping mode and slowly fall to the ground.
Attention
Always ensure the suspension setup is stable and secure to prevent damage or accidents during operation.
G1 Switching Off
Follow these procedures to safely switch off the G1 robot in various scenarios.
Sitting Shutdown [Method 1]
Stand behind the chair to assist the G1 robot in sitting, while the robot stands in front of the chair facing away from it. Ensure the robot remains stationary.
Hold the back of the shoulders and press
L1 + LEFTon the remote control to help G1 sit down.Perform the following steps to power off:
Press
L1 + Ato enter damping mode.Press and hold the battery power switch key for more than 2 seconds to shut down.
After shutting down:
Arrange the robot’s arm and foot joint limits according to body placement requirements.
If the G1 will not be used for a long time, remove the battery pack:
Hold down the battery pack clip with both hands and gently remove the battery.
Hanging Shutdown [Method 2]
Resuspend G1 on the protective frame to ensure it is stationary. The rope should maintain tension on the robot.
Perform the following steps to power off:
Press
L1 + Ato enter damping mode.Press and hold the battery power switch key for more than 2 seconds to shut down.
After shutting down:
Arrange the robot’s arm and foot joint limits for proper storage.
Remove the battery pack as described above if G1 will not be used for a long time.
Standing Shutdown [Method 2] (Not Recommended)
Danger
This method is not recommended as it can pose safety risks. Ensure caution to avoid injury or damage.
Hold G1 securely:
One hand should be positioned between the legs.
The other hand should hold the bracket on the back of the shoulders.
With assistance, press
L1 + Ato enter damping mode. The robot will lose balance; carefully lower it to the ground.Ensure the entire body is lying flat on the ground.
Press and hold the battery power switch key for more than 2 seconds to shut down.
After shutting down:
Arrange the robot’s arm and foot joint limits for proper storage.
Remove the battery pack as described above if G1 will not be used for a long time.
Attention
Always shut down G1 in a sitting or suspended position to avoid sudden falls and potential damage.
Avoid placing your hands near the robot’s movement joints to prevent injury.
G1 Packing
Packing Steps from Hanging Position
Important
Be careful to avoid pinching your hands at movement joints during the packing process.
Hang G1 vertically using the suspension system.
Lift the robot’s legs and fold them back until the waist is level, ensuring proper direction.
Slowly lower the suspension rope to guide the robot’s rear into the transport box.
Place G1 head and chest down, lying flat in the box, ensuring correct orientation.
Position the robot’s arms along its sides, rotating the wrists vertically to fit into the box.
Fold the legs back towards the body and ensure they fit snugly against the lining.
Add protective buffers to prevent collisions, place accessories (remote control, charger, etc.), and secure the square lining in the middle of G1.
Packing Steps from a Lying Position on the Ground
Caution
This process requires two persons for safe handling.
Place G1 head and chest down, lying flat on the ground, ensuring proper orientation.

Prepare the transport box next to the robot.
Lift G1’s legs and arms and carefully place it into the box with its head and chest down.
Twist and fold the arms as shown in the provided GIFs:
Left Arm Folding |

Right Arm Folding |
Fold the legs back towards the body and ensure they fit snugly against the lining.
|
|
Add protective buffers, include accessories (remote control, charger, etc.), and secure the square lining in the middle of G1.
G1 Basic Operation
Remote Control
The R3 remote control is part of the G1 remote control module, equipped with a digital transmission module and a Bluetooth module. Using the Unitree Explore App, the robot and remote control can be bound for seamless connection upon powering on.
Features:
3-axis posture and position stability control.
Movement capabilities include:
Forward, backward, left, right, turn in place.
Walking in predefined patterns: straight line, circular, linear, rectangular.
Navigation on flat surfaces, slopes, and steps.
Ergonomic design for improved grip and comfort.
Key Components
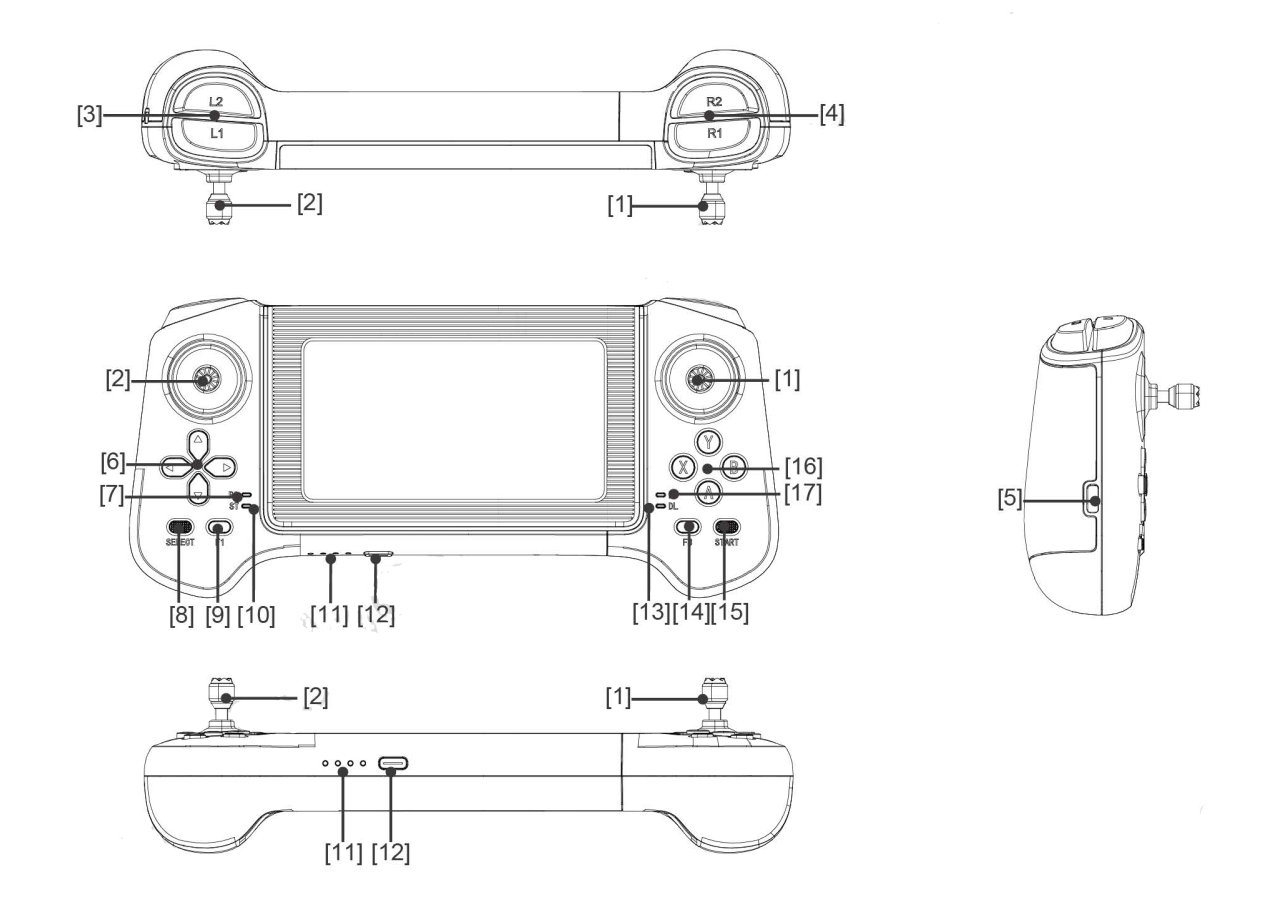
The remote control consists of the following key parts:
[1] Right Rocker
[2] Left Rocker
[3] Key L1 / L2
[4] Key R1 / R2
[5] Type C Charging Interface
[6] Arrow Keys
[7] Power Connect Indicator
[8] SELECT Key
[9] F1 (Function Setting Key)
[10] Charging Status Indicator
[11] Power Connect Indicator
[12] Power Button
[13] Data Transmission Indicator Light
[14] F3 (Function Setting Key)
[15] START Key
[16] Action Keys
[17] Bluetooth Signal Indicator Light
Technical Specifications
Parameter |
Specification |
Charging Voltage |
5.0V |
Charging Current |
700mA |
Battery Capacity |
780mAh Lithium Battery |
Communication Mode |
Data Transmission, Bluetooth |
Running Time |
5 hours |
Remote Control Range |
Above 100m (open environment) |
Installation and Calibration
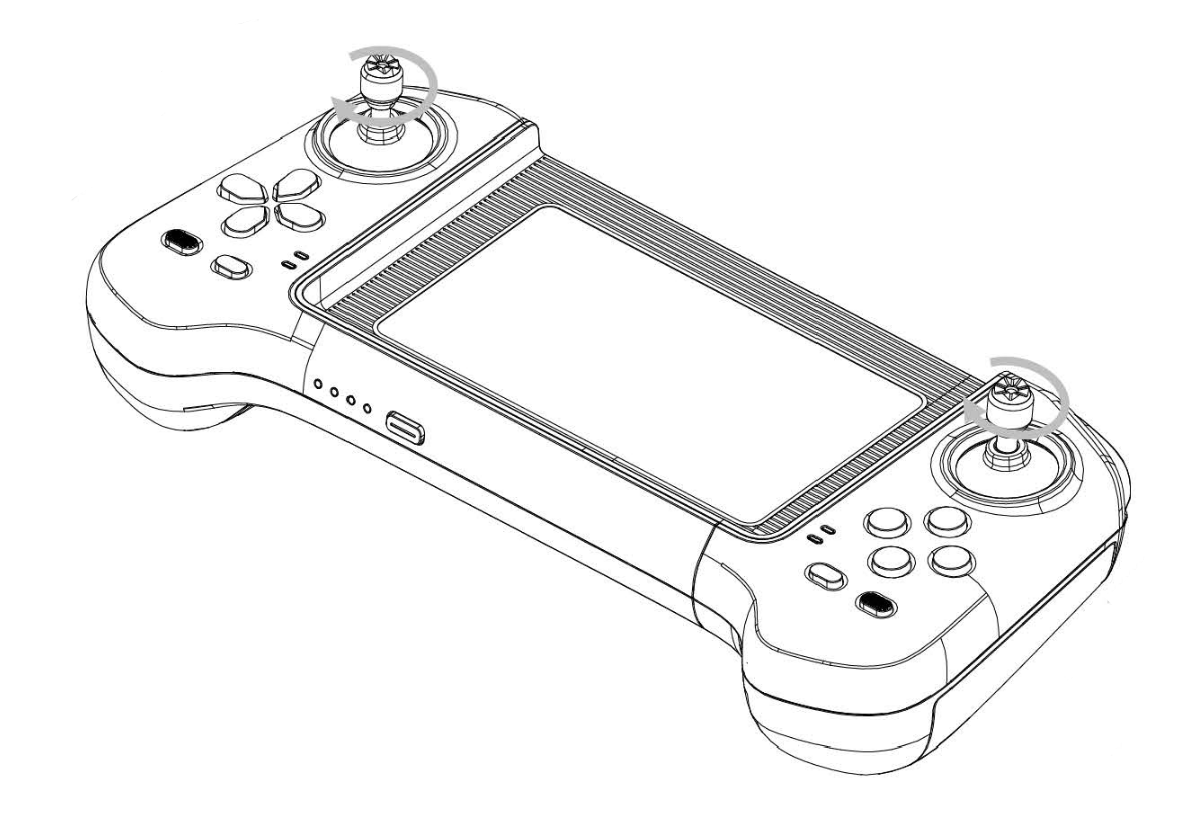
Installing the Joystick
Remove the joystick:
Pull out the remote control from the storage slot.
Remove the two joysticks.

Install the joystick:
Secure each joystick by rotating it clockwise until tight.
Rocker Calibration
Hold the remote control without touching the rocker.
Press
F1andF3simultaneously to enter calibration mode.The remote will emit a continuous “beep-beep” sound (1 beep/second).
Rotate the left and right rockers to full rudder several times.
When the beeping stops, press
F3once to save the calibration.
Attention
Do not touch the rockers before entering calibration mode.
Move the rockers only after calibration mode is active.
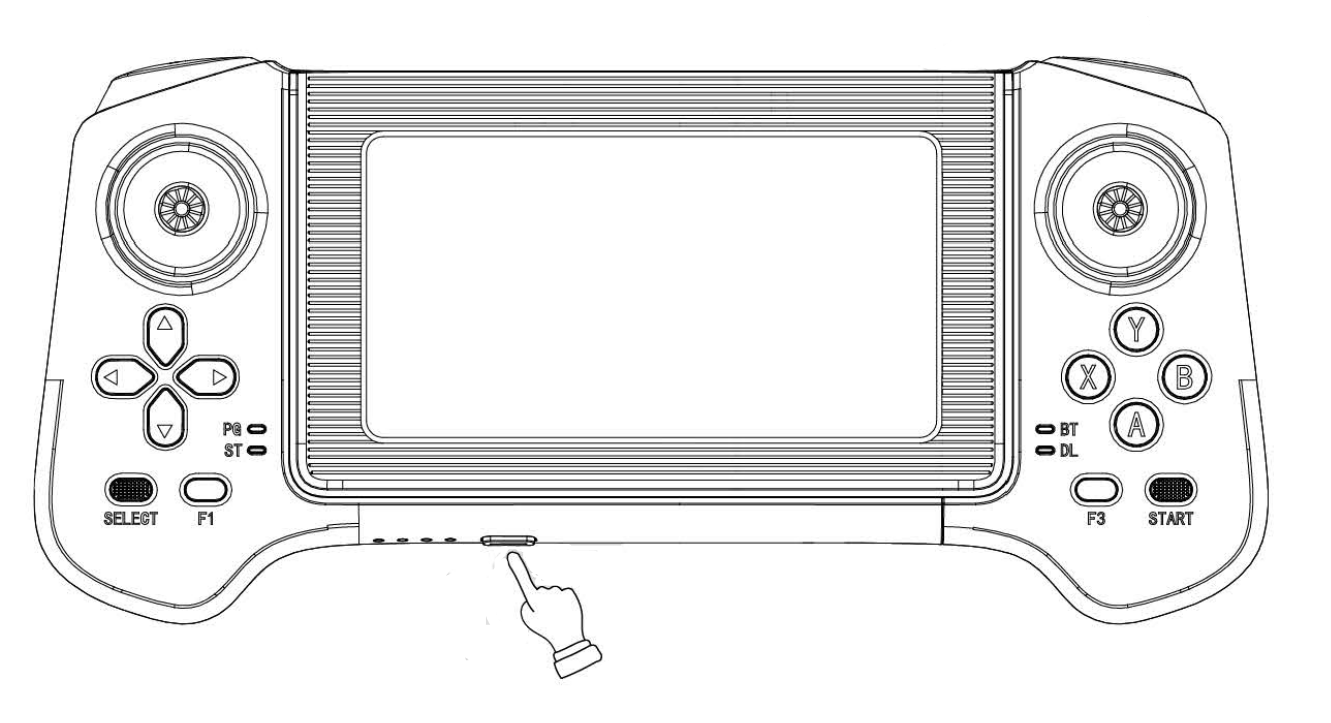
Powering On/Off
Turning On
Short-press the power button once.
Long-press the power button for 2+ seconds until you hear two “beeps.”
Turning Off
Short-press the power button once.
Long-press the power button for 2+ seconds until you hear three “beeps.”
Tip
The sequence is short press + long press for 2 seconds or more for both turning on and off.
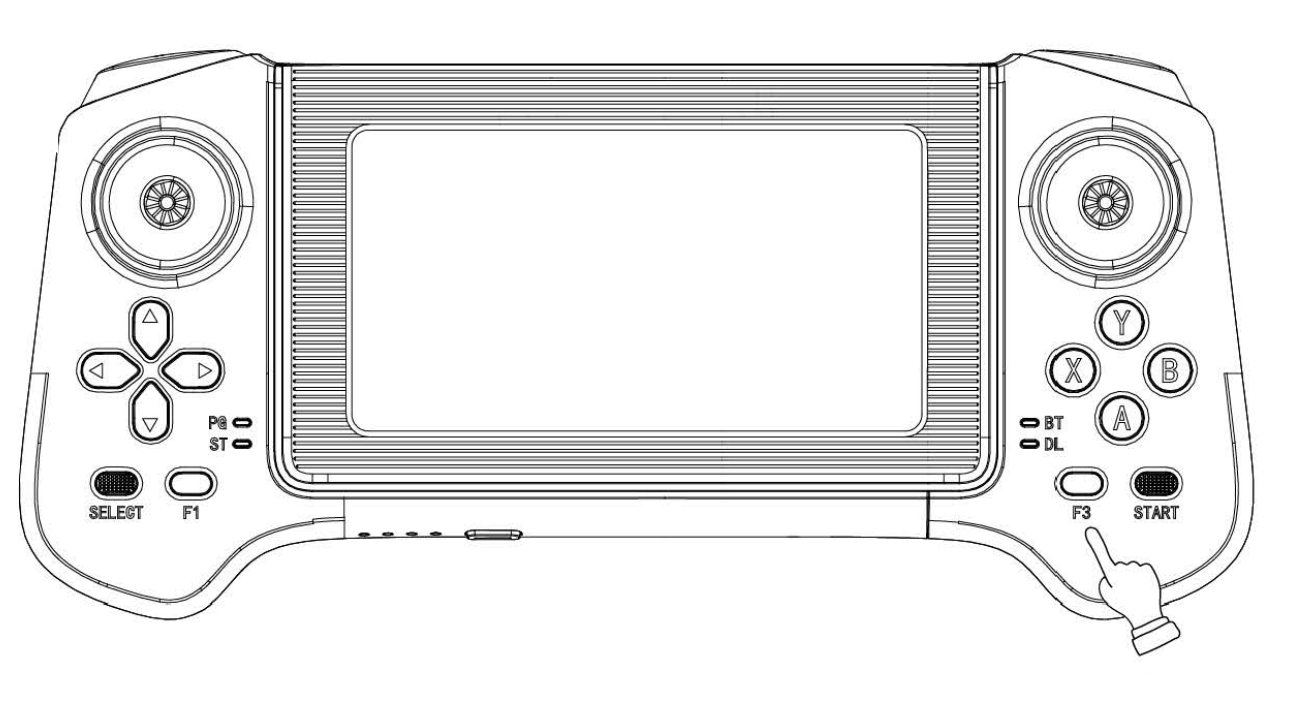
Vibration and Sound Settings
Vibration/Sound Toggle
Switching vibration: Quickly press
F33 times to switch to vibration mode.Switch sound: Quickly press
F33 times to switch to sound mode.
Vibration/Sound Switch
Turn off vibration/sound: Quickly press
F13 times to turn off vibration/sound.Turn on vibration/sound: Quickly press
F13 times turn on vibration/sound.
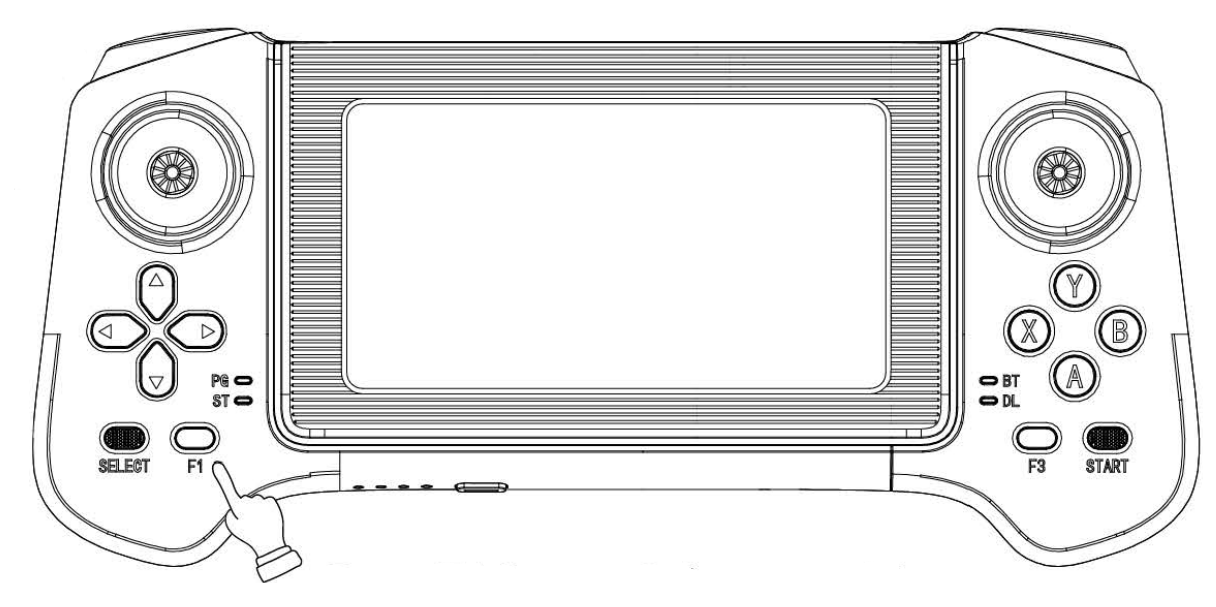
Save Feedback Settings
To save vibration/sound settings for the next startup: - Hold down the
F1button during shutdown.
Attention
By default, feedback settings (vibration/sound) are not saved after modifying.
Important
Always ensure to follow the correct steps to avoid damaging the remote control or affecting calibration accuracy.
Remote Control Binding
First-Time Use: Binding the Remote Control
To use the remote control for the first time:
Open the Unitree Explore App and Select “Device”.
Go to the “Data” Section.
Select “RemoteControl Binding”
Tap “Change” and enter the corresponding remote control code.

Navigate to “Device” |

Access the “Data” Tab |

Open “RemoteControl Binding” |

Select “Change” |
Once the remote control is bound to the digital transmission module on the robot, it can connect automatically in subsequent uses.
Verifying Connection
When the remote control is powered on and successfully connected to G1, the right DL indicator light will turn on.
This indicates the remote control is linked to the G1 digital transmission module, and you can now operate G1 using the remote control.
Remote Control Basic Operation
When using the remote control to maneuver the G1 robot with joysticks, follow these control methods:
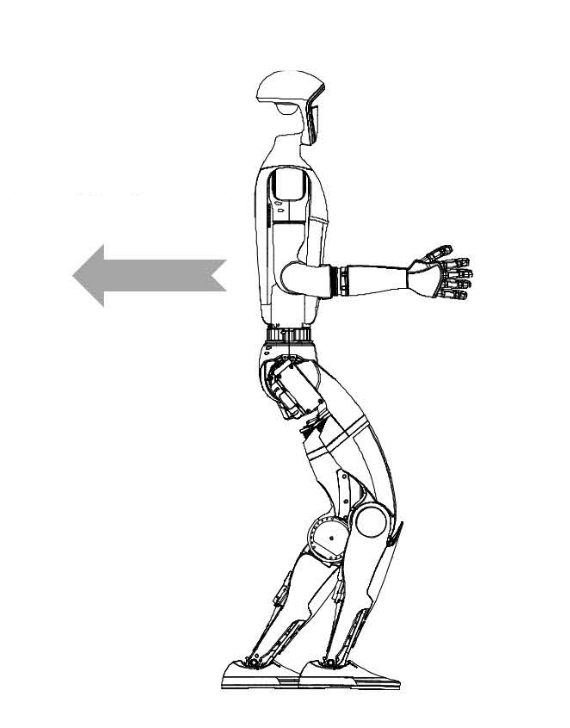
Left Joystick
Push Forward:
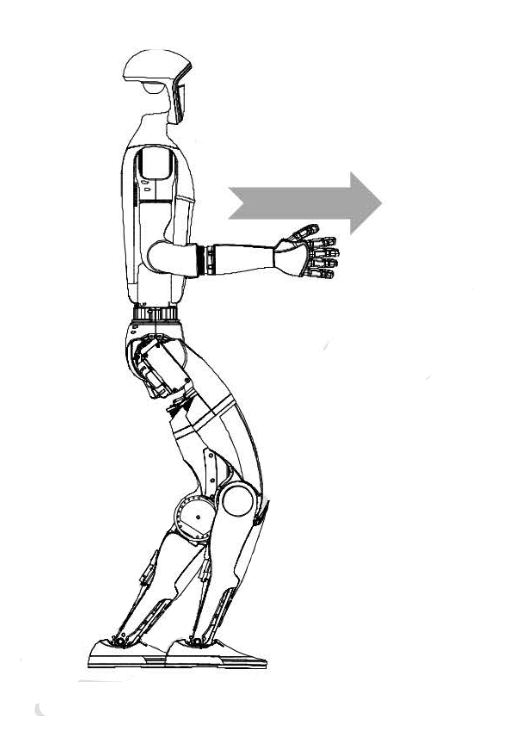
|

|
Push Backward:
|

|
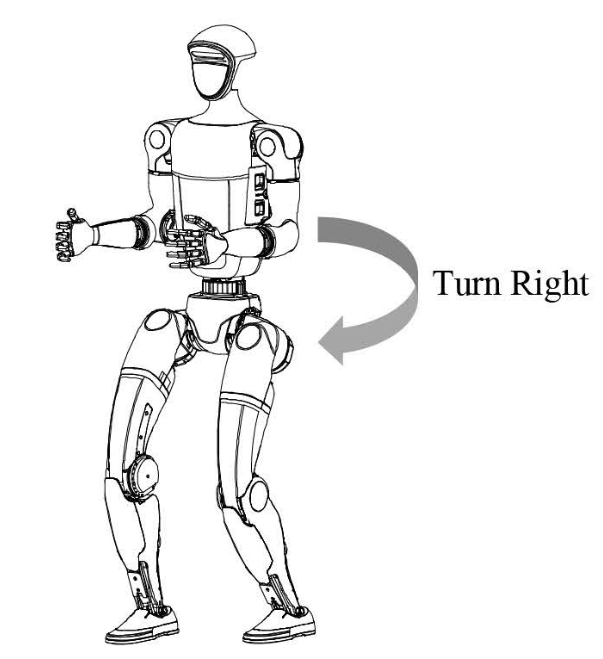
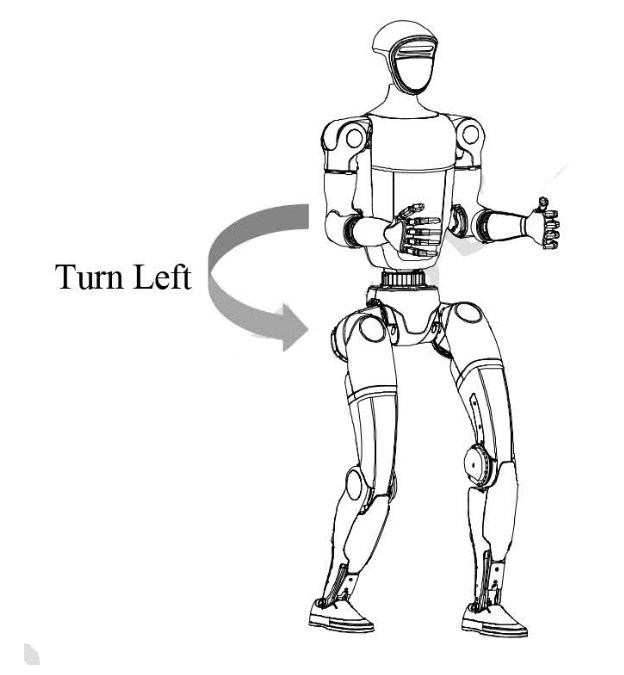
Right Joystick
Right Turn:
Push Joystick towards Right
Left Turn:
Push Joystick towards Left
Concept Descriptions
The G1 robot features several operational modes. Below is a detailed explanation of each mode:
Mode |
Description |
|---|---|
Zero Torque Mode |
All motors stop active motion; no damping is felt when the robot is moved manually. |
Damping Mode |
Motors stop active motion but provide resistance, allowing transition to ready mode. |
Ready Mode |
The robot assumes a preparatory posture for motion within 5 seconds. |
Squat Mode |
The robot slowly transitions to a squat position (no balance control). |
Seating Mode |
The robot assumes a seated position (no balance control). |
Motion Mode |
Enables motion control via the remote control. |
Continuous Walking Mode |
The robot continuously steps without stopping. |
Standing Mode |
Robot maintains balance; it steps if the joystick is engaged or balance is disturbed. |
Debug Mode |
Used for SDK development. Motion control is paused to prevent command conflicts. |
Important
The current walking mode of the G1 robot does not support stair climbing. Avoid attempting to climb stairs to prevent damage.
Mode Switching
The robot allows seamless transitions between modes using specific commands:
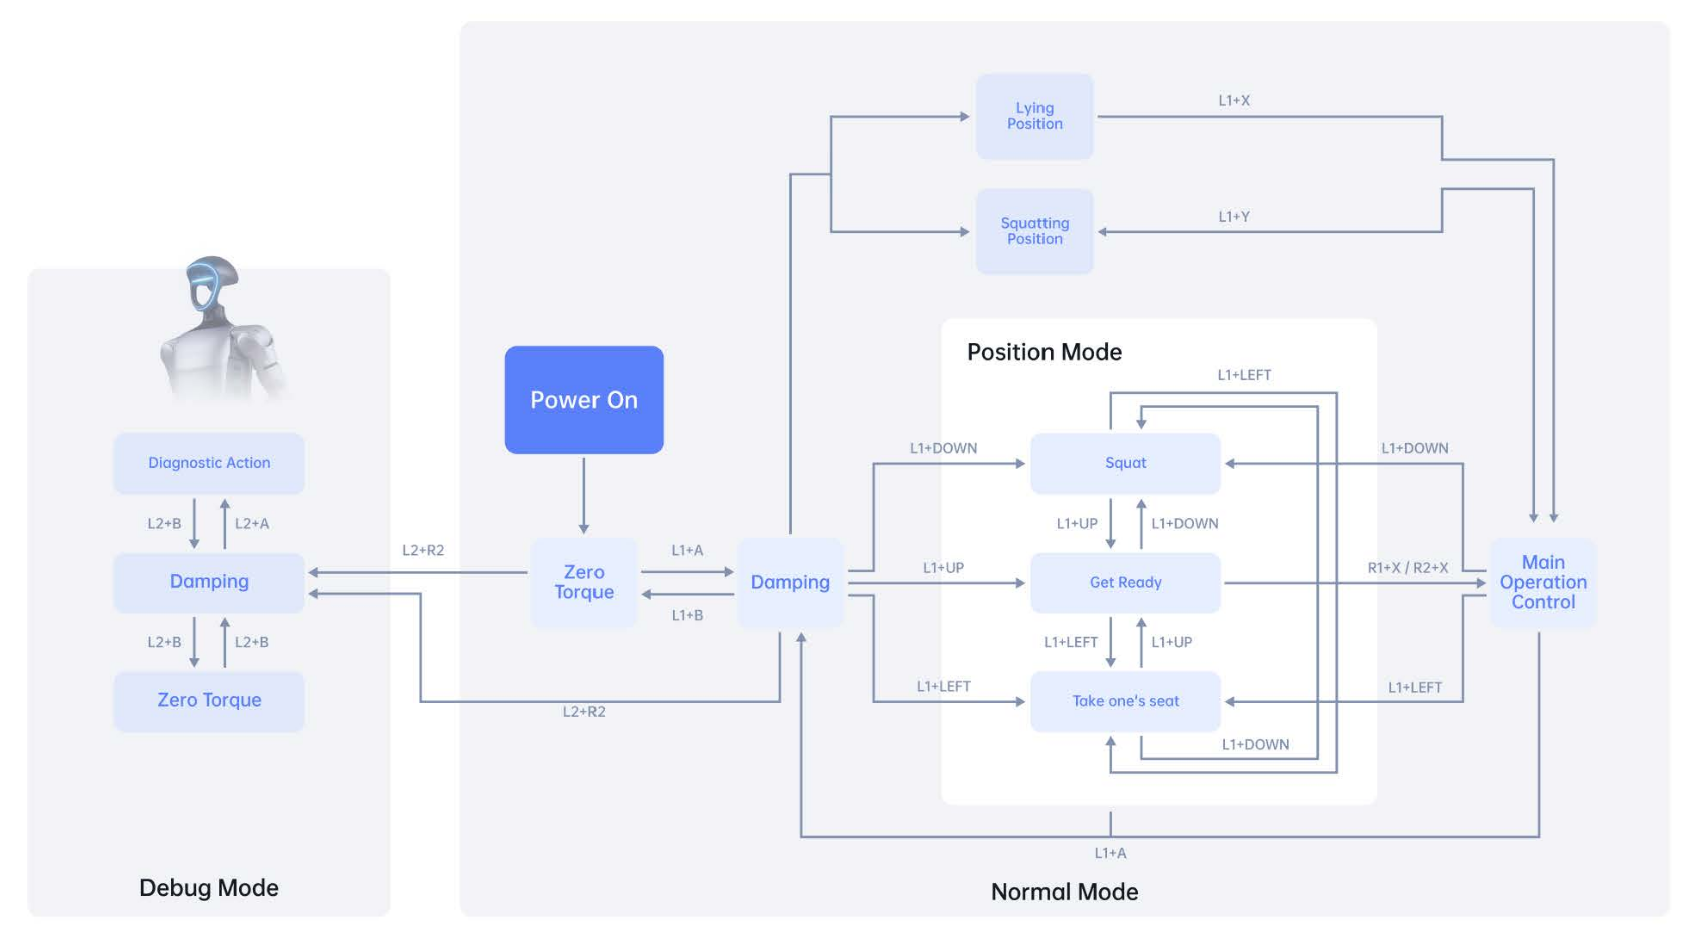
Important
To switch back to Main Operation Control mode after using the squatting position (L1 + Y), follow these steps:
Enter damping mode using L1 + A.
Switch to Main Operation Control mode using L1 + Y.
Key Descriptions
Posture Modes
Use the following button combinations to switch between various posture modes:
Mode |
Button Combination |
Description |
|---|---|---|
Debug Mode |
Hold L2 + Click R2 |
Enter debug mode for testing and development. |
Zero Torque Mode |
Hold L1 + Click B |
Switch to zero torque mode. |
Damping Mode |
[1] Hold L1 + Click A |
Activate damping mode for smooth motion. |
Lock Stand |
[2] Hold L1 + Click UP |
Lock the robot in a standing posture. |
Seated Mode |
[4] Hold L1 + Click LEFT |
Switch to seated posture. |
Squat Mode |
Hold L1 + Click DOWN |
Transition to squat posture. |
Lying and Standing |
[5] Hold L1 + Click X |
Switch between lying and standing positions. |
Squat Switch |
[6] Hold L1 + Click Y |
Alternate between squatting postures. |
Interactive Functions
The G1 robot supports various interactive gestures. Use the table below for guidance:
Gesture |
Button Combination |
Description |
|---|---|---|
Wave Hand |
Hold SELECT + Click Y |
Robot waves its hand. |
Handshake |
Hold SELECT + Click A |
Robot performs a handshake gesture. |
Turn Around and Wave Hand |
Hold SELECT + Click X |
Robot turns and waves at the user. |

G1 Handshake |
G1 Turn Around And Wave Hand |
G1 Wave Hand Right |

G1 Wave Hand Left |
[3] R2 + X(Run Control) |
Button Combination |
Increase the lift height |
Click B |
Decrease leg lift height |
Click A |
Increase standing height |
Click Y |
Decrease standing height |
Click X |
Slow Running |
R1 + left rocker |
Fast Running |
R2 + left rocker |
[3] R1 + X (Main Operation Control) |
Button Combination |
Keep stepping (not recommended) |
Double Click START |
Standing |
Click START |
Low speed mode |
Double-Click L2 |
High speed mode |
Double-Click L1 |
Offset Compensation |
Left Offset:Hold R1 + Click - → Right Offset: Hold R1 + Click - ← Forward Offset: Hold R1 + Click ↓ Backward Offset Hold R1 + Click ↑ |

G1 Low Speed Mode |

G1 High Speed Mode |
[7] R1 + Y (Only Used For 3-DOF Waist Structure) |
Button Combination |
Keep stepping (not recommended) |
Double Click START |
Standing |
Click START |
Low speed mode |
Double-Click L2 |
High speed mode |
Double-Click L1 |
Offset Compensation |
Left Offset:Hold R1 + Click - → Right Offset: Hold R1 + Click - ← Forward Offset: Hold R1 + Click ↓ Backward Offset Hold R1 + Click ↑ |
[8] R2 + Y (Only Used For 3-DOF Waist Structure) |
Button Combination |
Increase the lift height |
Click B |
Decrease leg lift height |
Click A |
Increase standing height |
Click Y |
Decrease standing height |
Click X |
Keep stepping (not recommended) |
Click START |
Waist Control |
Hold SELECT + Right Rocker |
Important
Starting in lying or squatting positions is only suitable for flat and hard ground. Using these modes on uneven surfaces may lead to instability and potential damage.
If equipped with dexterous hand equipment, avoid starting in lying or squatting positions to prevent damage to delicate components.
Boot Processes
Regular Boot Process
Boot -> [1] -> [2] -> [3] -> Demo -> [4] (Chair Seat) -> Turn off.
Lying Boot Process
Ensure the boot device crotch is flat against the ground.
Boot -> [1] -> [5] -> Demo -> [6] -> Turn off.
Squatting Boot Process
Start in a squatting posture.
Boot -> [1] -> [6] -> Demo -> [6] -> Turn off.
3-DOF Waist structure
[7],[8] Only Used For 3-DOF Waist structure, recommended to use R1 + Y mode
Remote Control Timeout
If the R3 remote control is not connected to the robot or phone after turning on, the robot will automatically shut down within 10 minutes of inactivity. To reconnect, power the robot on again.